Making resource assignments and trip updates
You can use the Assign Driver/Equipment window to plan resources on a trip, add empty moves at the beginning/end of the trip, and update the trip’s status.
To access the Assign Driver/Equipment window, do one of the following:
-
In Order Maintenance
Retrieve the order, then click Asset Assignment.
 -
In Trip Folder
Retrieve the trip, then go to Edit > Asset Assignment. -
In Planning Worksheet
Select the trip in the Planning Worksheet’s Available Trips grid, then go to Edit > Asset Assignment.
The Assign Driver/Equipment window is displayed.
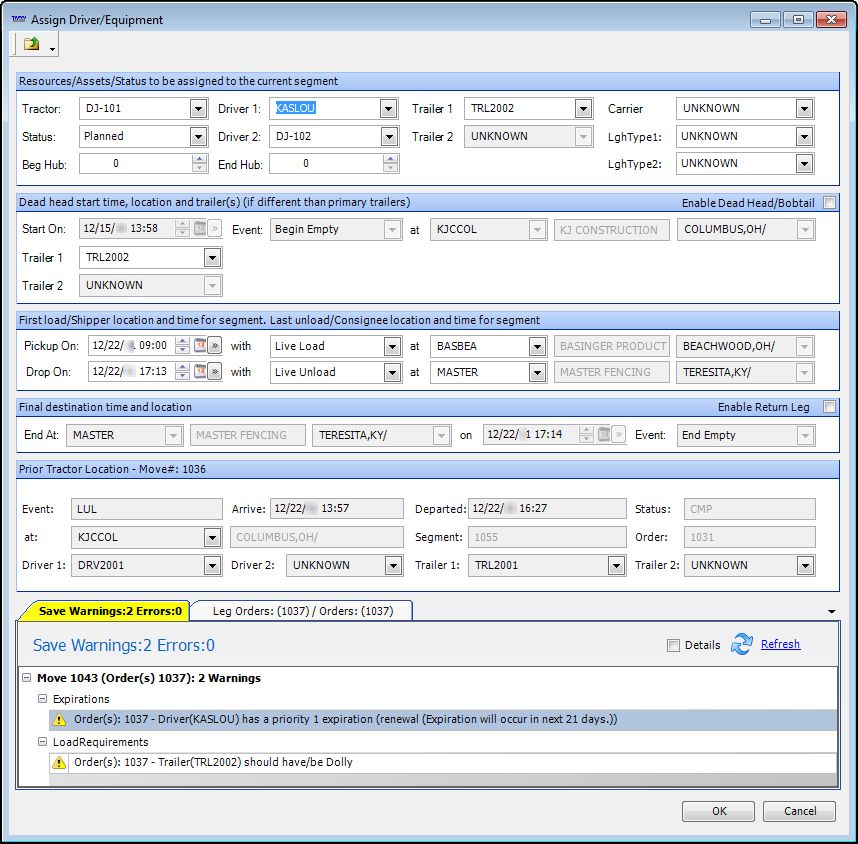
Planning resources on a trip
With the trip selected and the Assign Driver/Equipment window open, follow these steps to assign resources to a trip.
-
In the Resources/Assets Status to be assigned to the current segment section, select the resources that will perform the trip.
-
Click OK to close the window.
If no conflicts are detected, the Assign Driver/Equipment window closes.Note: If conflicts are detected, the system will display a message in the Save Warnings section of the window. For information on how conflicts are handled, see Responding to warnings and fixing errors.
-
Click
 Save.
Save.
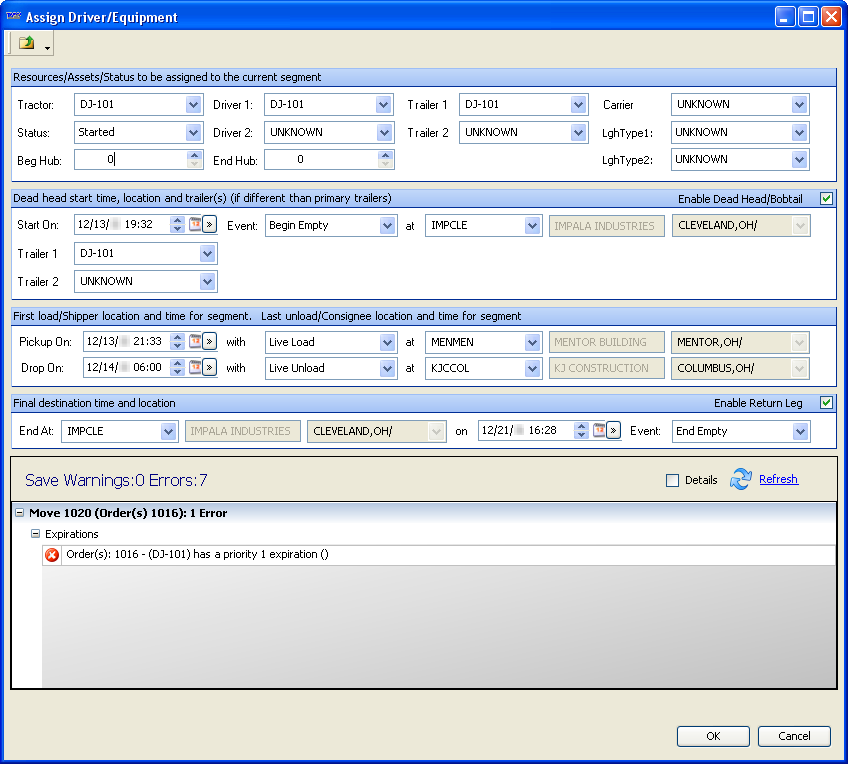
Updating a trip’s dispatch status
As the trip progresses, you can update its dispatch status. For example, when you have notified the driver about the trip, you can set the status to Dispatched. When the resources arrive at the first pickup, you change it to Started. You can make these status changes in the Assign Driver/Equipment window.
-
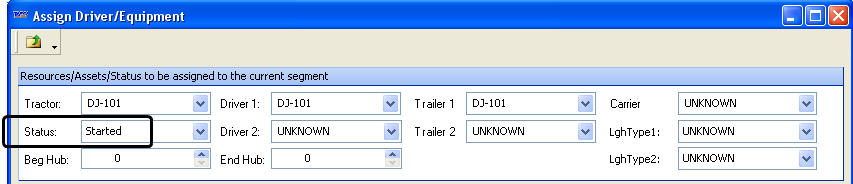
With the trip selected and the Assign Driver/Equipment window open, select the appropriate option in the Status field.
-
Click OK to close the window.
-
Click
Save in the main toolbar.
Starting a trip with an empty move
If you know the tractor you want to assign to a trip is not at the trip’s first pickup location, you can add an empty move to the start of the trip in the Assign Driver/Equipment window.
To insert an empty leg at the beginning of the trip, follow these steps:
-
With the trip selected and the Assign Driver/Equipment window open, select the Dead Head/Bobtail checkbox in the Dead head start time section of the window.
Note: By default, the checkbox is cleared. However, if you prefer that it be selected automatically, you can change the default behavior with the
[Asset Assignment]DHCheckBoxsetting in your TTS50. -
Make entries to define the move.
For information about these fields, see Dead head start time, location and trailer(s).
-
Click OK to close the window.
-
Click
Save in the main toolbar.
Ending a trip with an empty move
To end a trip with an empty leg, follow these steps:
-
With the trip selected and the Assign Driver/Equipment window open, select the Return Leg checkbox in the Final Destination time and location section of the window.

-
Make entries to identify the ending location and the event type of the empty move.
For information about these fields, see Final Destination time and location section. -
Click OK to close the window.
-
Click
Save in the main toolbar.
Shifting an empty move to the end of the tractor’s prior trip
You can set up the system so that you can shift an empty move from the beginning of a trip to the end of the tractor’s prior trip. For setup information, see Allowing a begin empty move to be shifted to the end of the tractor’s prior trip.
|
To shift a begin empty move to the end of the tractor’s prior trip, that trip cannot:
|
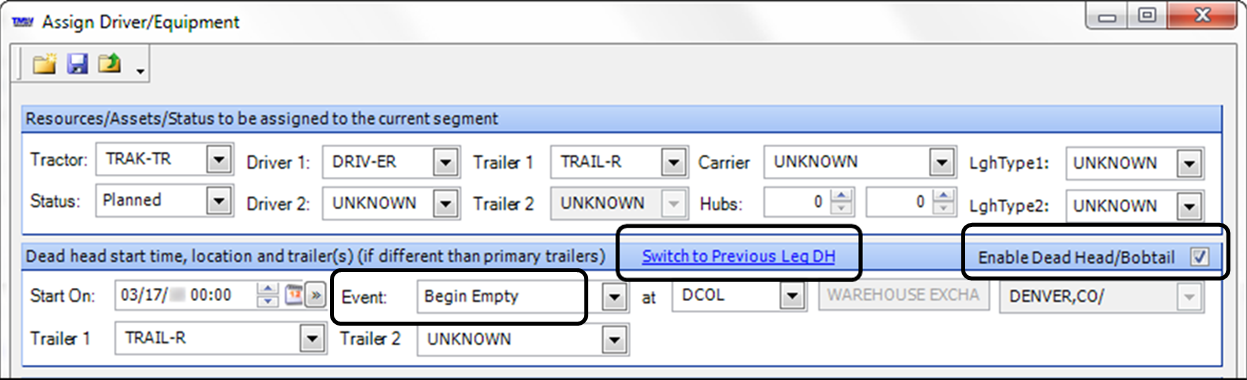
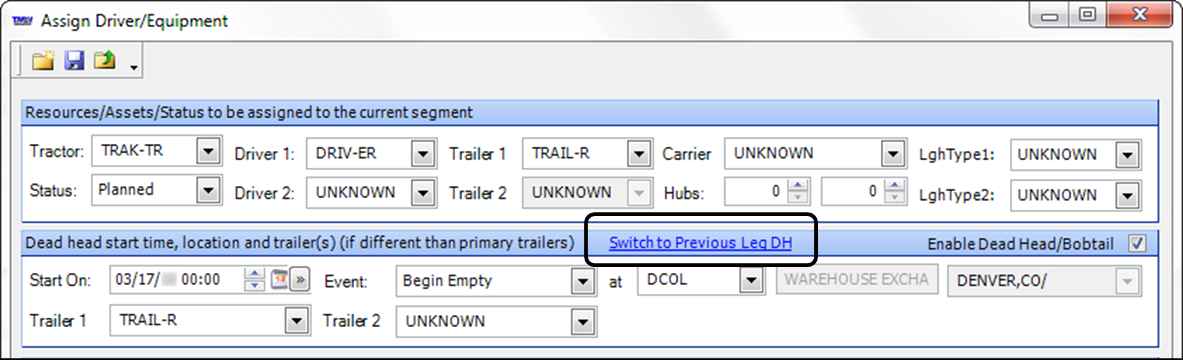
When you plan a trip in the Assign Driver/Equipment window using an eligible tractor, and then add a deadhead or bobtail event, an active hyperlink appears in the Dead head start time… section. You click the link to place the empty event at the end of the tractor’s prior trip. By default, the system adds the event as an End Empty (EMT), but you can change the event during asset assignment.
In the Trip Folder, follow these steps:
-
Open an order.
-
Go to Edit > Asset Assignment.
The Assign Driver/Equipment window opens. -
In the Resources/Assets/Status… section, plan the order using an appropriate tractor.
Note: If the trip already begins with an empty event, you can continue with this procedure.
-
In the Dead head start time… section, do one of the following:
-
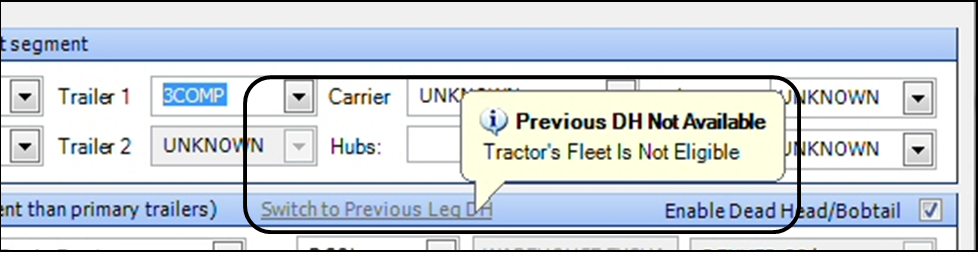
If the Switch to Previous Leg DH hyperlink is gray or invisible, the tractor or the previous trip does not meet the required conditions. See Allowing an empty move to be shifted to the end of the tractor’s prior trip. Review your setup and tractor selection. If you continue planning with the current tractor, the empty event will not be moved to the previous trip.
Note: If a gray link is present, you can move the cursor over the link to display the reason the link is inactive.
-
If the Switch to Previous Leg DH hyperlink is blue, it is active.
-
Select the Enable Dead Head/Bobtail checkbox if it is cleared.
-
Click the hyperlink and wait for the system to complete the operation.
When the system completes the operation:
-
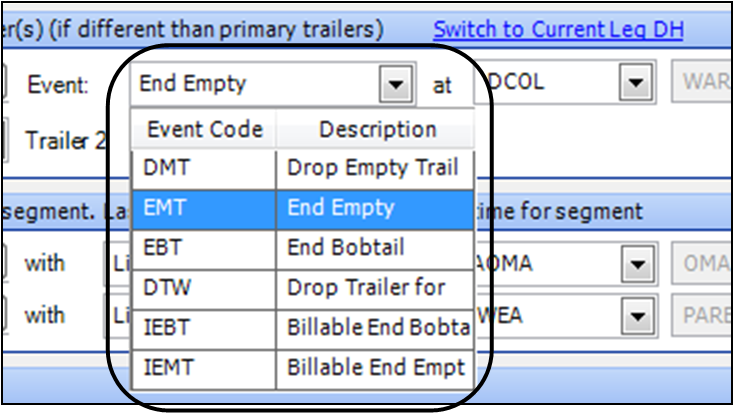
The Switch to Previous Leg DH hyperlink changes to Switch to Current Leg DH.
-
The Event field changes to End Empty.
-
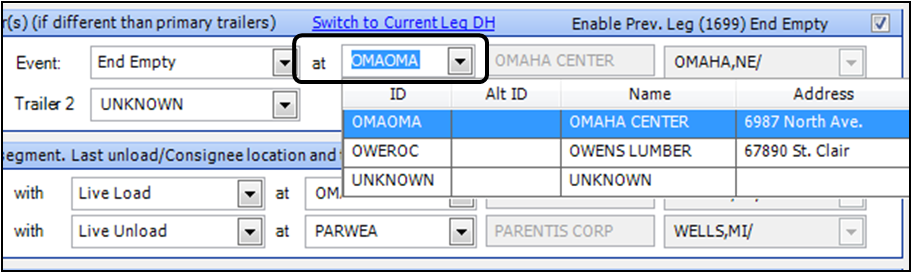
The at fields display the location where the previous trip ends.
-

-
-
If necessary, select a different event code from the Event field option list.
-
Change the company ID in the location field to that of the first stop of the current trip.
-
In the Assign Driver/Equipment window, click OK.
The system processes the assignment, moves the empty event to the end of the tractor’s prior trip, and saves both trips. The Assign Driver/Equipment window closes.
-
In the Trip Folder, edit the trip as needed and click
 Save.
Save. -
In the Trip Folder, open the tractor’s prior trip and confirm the following in the Stops grid:
-
The correct empty event has been added to the end of the trip.
-
The empty event’s location is the start of the tractor’s next trip.
-
The empty event’s Miles and Bill miles fields are correct.
-
The empty event’s arrival and departure dates/times are correct.
-
Other stop events are correct.
Note: The type of event you add to the end of the trip can cause the system to change other event codes. For example, if you add an End Bobtail (EBT) to a prior trip that previously ended in a Live Unload (LUL), the LUL will be changed to a Drop Loaded Trailer (DRL).
-
-
If you have modified the trip, click
Save.