Setting up the system to use expirations
Expirations are records of important activities and out-of-service dates. Some common expirations are preloaded in the feature as system codes, such as Vacation, Sick, and Terminated. However, you can add you own expiration options.
In addition, several configuration settings allow you to control how the feature works.
Setting up labels for expiration types
Before you can create expiration records for a driver, tractor, trailer, or carrier you must define the kinds of expirations your company will use. Expirations are defined in the label file, accessed in the Edit User Definable fields window. There are two types of labels used for expirations:
-
Resource expiration labels
Resource expiration labels are used to define the actual expirations your company will use to take resources temporarily or permanently out of service. They include: DrvExp (driver expirations), TrcExp (tractor expirations), TrlExp (trailer expirations), and CarExp (carrier expirations). -
Resource status labels
Each resource expiration label option must have a matching resource status label option. Resource status labels include: DrvStatus (driver status), TrcStatus (tractor status), TrlStatus (trailer status), and CarStatus (carrier status).
Expiration-specific system codes
The following tables identify the system codes for the resource expirations labels. The tables also identify when a matching resource status label option must be created by your company.
| You cannot delete a system code label. |
Labels for drivers: DrvExp/DrvStatus matching codes
| DrvExp | Abbr | Code | DrvStatus | Abbr | Code |
|---|---|---|---|---|---|
Vacation |
VAC |
200 |
Vacation |
VAC |
200 |
Sick |
SIC |
210 |
Sick |
SIC |
210 |
Send Home |
HOME |
220 |
Send Home |
HOME |
220 |
Terminated |
OUT |
900 |
Terminated |
OUT |
900 |
In Svc Position |
INS |
901 |
In Svc Position |
INS |
901 |
Labels for tractors: TrcExp/TrcStatus system codes
| TrcExp | Abbr | Code | TrcStatus | Abbr | Code |
|---|---|---|---|---|---|
In the Shop |
VAC |
200 |
In the Shop |
VAC |
200 |
In Svc Position |
INS |
250 |
In Svc Position * |
INS |
250 |
Terminated |
OUT |
900 |
Out of Service |
OUT |
900 |
* Identifies an option that is not a system code. It must be created by your company. |
|||||
Labels for trailers: TrlExp/TrlStatus system codes
| TrlExp | Abbr | Code | TrlStatus | Abbr | Code |
|---|---|---|---|---|---|
In the Shop |
VAC |
200 |
In the Shop |
VAC |
200 |
In Svc Position |
INS |
250 |
In Svc Position * |
INS |
250 |
Out of Service |
OUT |
900 |
Out of Service |
OUT |
900 |
* Identifies an option that is not a system code. It must be created by your company. |
|||||
Labels for carriers: CarExp/CarStatus system codes
| CarExp | Abbr | Code | CarStatus | Abbr | Code |
|---|---|---|---|---|---|
Active |
ACT |
10 |
Active |
ACT |
10 |
Inactive |
OUT |
20 |
Inactive |
OUT |
20 |
Adding your own expiration options
You can add expiration options as needed. For detailed information on adding options, see Using the label file to customize fields.
When you add and save a resource expiration type (DrvExp, TrcExp, TrlExp) having a code greater than 199, the system displays a message reminding you that you must set up an identical option in the corresponding resource status label (DrvStatus, TrcStatus, TrlStatus). You must use the same code for an expiration/status label pair.
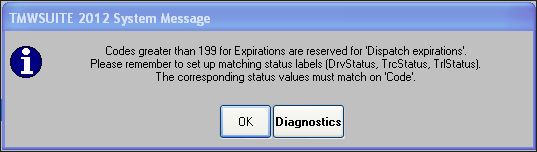
| The message indicates expiration labels with codes greater than 199 require setup of matching status labels. However, all expiration labels require setup of matching status labels. If you fail to do this, the expiration will not be functional. |
Adding expiration options for carriers
When you add and save a new expiration option in the CarExp label, the system automatically creates a matching option in the CarStatus label.
If you add a new CarStatus option first, the system does not automatically create a matching CarExp label. You must add the matching CarExp option manually.
You must use the same code for an expiration/status label pair. If you edit or delete an existing entry in either the CarExp or CarStatus label, the change will not be copied to the other label.
| Two carrier expirations established as system codes are Active and In Active, abbreviated as ACT and INA, respectively. If you set up other carrier expirations, you cannot use INS as an abbreviation. INS is reserved for In Service expirations, which do not apply to carriers. Using INS for carriers will cause the system to insert In Service expirations. |
Specifying when expiration indicators are to turn yellow
For Priority 1 and Priority 2 expirations, indicators turn yellow a user-defined number of days prior to the expiration start date. The [Misc]ExpDate setting in your TTS50 is used to set the number of days. The default is 14 days; however, you can change that number.
Allowing resources with future expirations to be planned on trips
By default, you cannot assign a resource to a future trip if that resource has a future Priority 1 expiration that conflicts with the trip. This presents problems if the expiration is tentative and subject to change. To set up the system so you can plan future trips even if the resources have expirations that conflict with trip dates, use the [Dispatch]FutureAssetExpirationProcessing setting in your TTS50.
Specifying the types of expirations dispatchers can modify
Expiration types are defined in the label file, accessed in the Edit User Definable fields window. Your company determines which expirations dispatchers can add, modify, and complete.
By default:
-
Dispatchers can add or modify Dispatch type expirations.
-
Dispatchers cannot add or modify Non-dispatch type expirations.
The [Dispatch]OverrideDispExp and the [Dispatch]Allow900Exp settings in your TTS50 determine which expirations can be added and edited by dispatchers.
-
Dispatchers can edit dispatch and non-dispatch expirations using
[Dispatch]OverrideDispExp. -
Dispatchers can edit expirations with codes of 900 or greater using
[Dispatch]Allow900Exp. Expirations with a code of 900 are used to:-
Terminate drivers, tractors, and trailers.
-
Take equipment out of service for preventative maintenance by the ShopLink add-on module.
-