Tracking changes to orders or trips
By default, TMW Operations does not track changes made to orders or trips. However, you can enable two optional tracking features. With these tracking features enabled, the system will display tracking data on the Activity Audit tab and the Trip Audit tab.
-
The Activity Audit tab
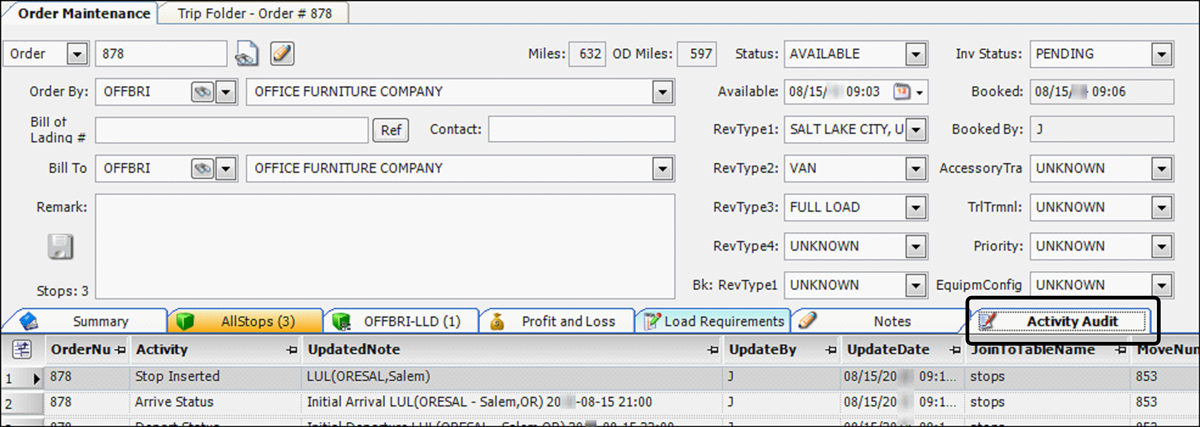
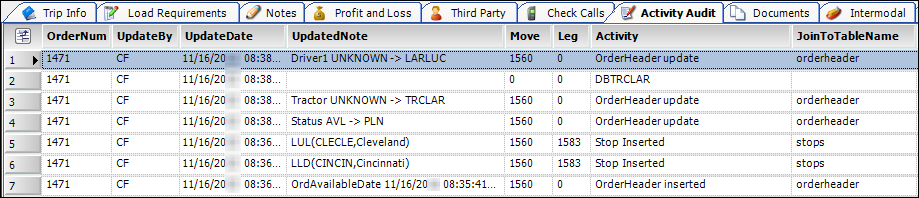
This tab is located in Order Maintenance and in Trip Folder. By default, this tab displays changes made to billable stops.
-
Order Maintenance
-
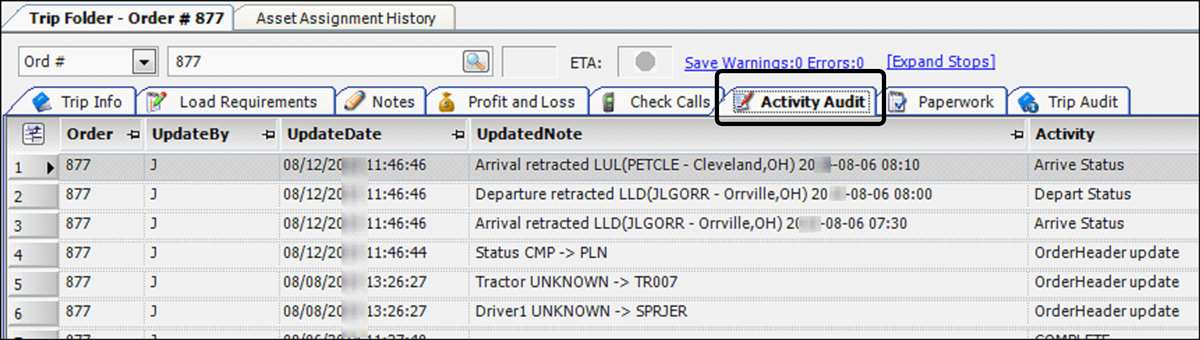
Trip Folder
-
-
The Trip Audit tab
This tab is located in the Trip Folder and in the Asset Assignment History window. This tab displays changes made to billable and non-billable stops.
-
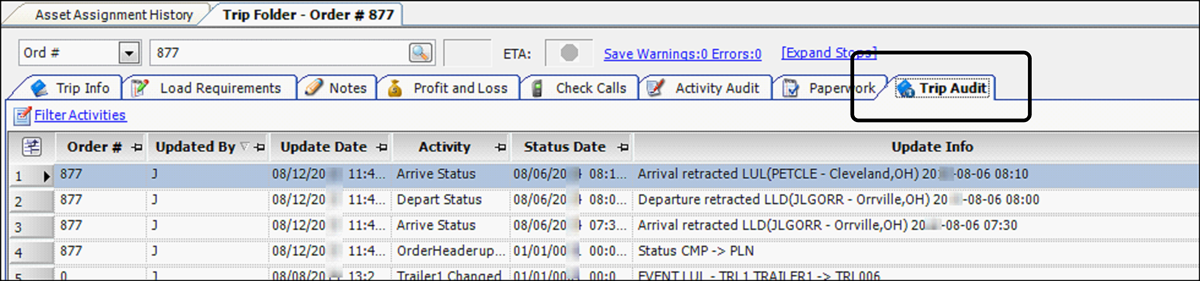
Trip Folder
-
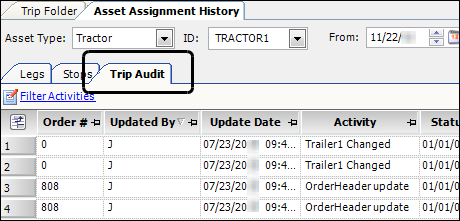
Asset Assignment History window
-
Tracking changes with the Activity Audit feature
During an order’s life cycle, multiple people may make many changes to the order. You can view a list of changes by retrieving the order in Order Maintenance or the Trip Folder, and selecting the Activity Audit tab.
Activity Audit operates in the background. Therefore, it does not affect users' interaction with the system. In addition to TMW Operations, the Activity Audit feature tracks changes to data in many TMW products, including TMWSuite, Fuel Dispatch, and CRM Right. Therefore, it tracks more than just changes to orders. To see a list of tracked changes that occur within TMW Operations, see the Events that are tracked section in the Activity Audit guide.
Enabling the Activity Audit feature
By default, the Activity Audit tab does not display changed data. To track changes, use the FingerPrintAudit General Info Table setting to enable the feature.
| Enabling this feature may cause system performance issues. It is recommended that you contact your TMW Systems Support team before enabling this feature. |
Viewing changes on the Activity Audit tab
To view the changes on the Activity Audit tab, follow these steps:
-
Open the Trip Folder or the Order Maintenance window.
-
Retrieve the order.
-
Select the Activity Audit tab.

Note: By default, oldest information is shown at the top of the grid. Clicking the Updated Time column header re-sorts the change data from oldest to most recent. If columns are too narrow to display all the data they contain, you can hold your pointer over the field to view the entire content.
Field Definition OrderNumber
ID of the record
UpdateBy
ID of the user who made the change
UpdateDate
Date/time the change occurred
UpdatedNote
Detailed information about the event
For example, the creation of the order, or the insertion of invoice details.
MoveNumber
System-assigned ID of the movement
Note: A movement is the record of all of the activities performed by the resources (driver, tractor, trailer, and carrier) assigned to execute a trip.
JoinToTableName
Primary table in the database affected by the change
Note: Not all events will show a primary table name.
Activity
Event that caused the change
Note: To see a list of lists the events that are tracked, see the Events that are tracked section in the Activity Audit guide.
KeyValue
System-assigned ID used to track the change
LegNumber
Trip segment affected by the change
Note: A trip segment is the portion of a movement that is executed by the same driver and tractor.
TarNumber
Reserved for future functionality
Displaying changes associated with non-billable stops on the Activity Audit tab
By default, the Activity Audit tab displays changes that are associated with an order’s billable stops. However, you can set up the system to also track the changes made to the move associated with the order. When you do, you will also be able to see changes made to the non-billable stops, such as empty moves.
| A movement is the record of all of the activities performed by the resources (driver, tractor, trailer, and/or carrier) assigned to execute a trip. The system assigns a unique ID number to a movement when it is first saved. This number can be considered the blanket ID for all activities that occur during a trip. |
Here is an example of how the [Dispatch]ActivityAuditRetrieveKey= Mov_number setting affects the data displayed on the Activity Audit tab. The system displays data associated with both billable and non-billable stops. A zero (0) is shown in the OrderNum column of the non-billable stops. This is because non-billable stops are not associated with order numbers.
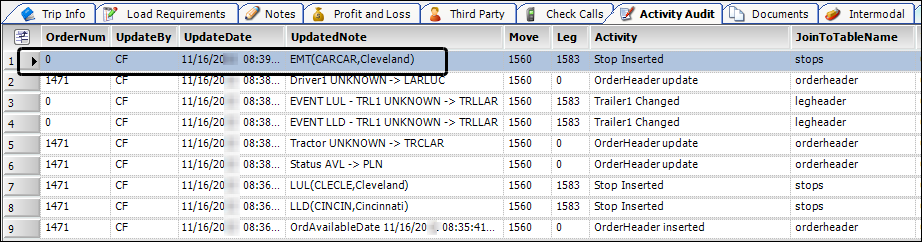
Use the [Dispatch]ActivityAuditRetrieveKey setting in your TTS50 to specify the record type changes that will appear on the Activity Audit tab.
Tracking changes with the Trip Audit feature
First available in TMW Operations: 14.30.132
During an order’s life cycle, multiple people may make many changes to the order. You can use the Trip Audit tab to track a trip’s history. You can view a list of changes on the Trip Audit tab in the Trip Folder or the Asset Assignment History window.
-
Trip Folder
These changes are associated with the selected order.
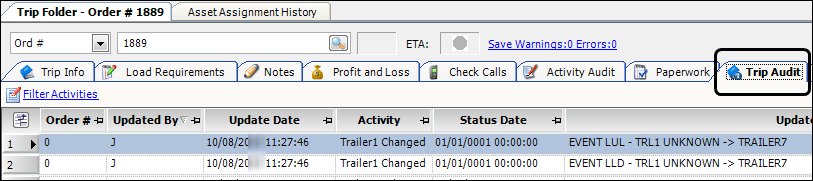
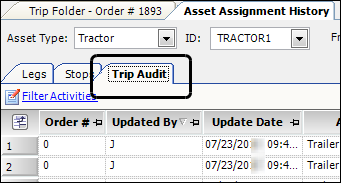
Note: The system displays a 0 (zero) in the Order # field when the change is associated with a non-billable event.
-
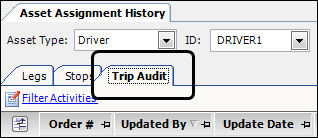
Asset Assignment History window
These changes are associated with the selected asset, such as a driver or tractor. The list can include information from multiple trips to which the resource was assigned.
Notes:
-
In the Trip Audit Activities window, you can view and filter the types of information being tracked. For more information, see Filtering data on the Trip Audit tab.
-
The Trip Audit feature operates in the background. It does not affect a user’s interaction with the system.
-
This feature requires that your database is set up to run TMWSuite V.2011.10_08.0208 or greater.
-
Enabling this feature may cause system performance issues. It is recommended that you contact your TMW Systems Support team before enabling this feature.
-
Enabling the Trip Audit feature
The UseTripAudit General Info Table setting enables the Trip Audit feature and adds the Trip Audit tab to the Trip Folder and the Asset Assignment History window.
Viewing changes on the Trip Audit tab in the Trip Folder
You can access the Trip Audit tab in the Trip Folder to view changes made to a specific trip.
-
Go to Operations > Trip Folder.
-
Retrieve an order.
-
Select the Trip Audit tab.
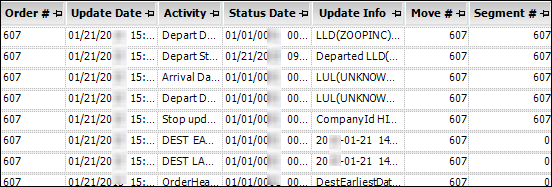
Column Definition Order #
Order ID
Update Date
Date/time the change occurred
Activity
Event that caused the change
Status Date
Date and time the order status changes
Updated Info
Detailed information about the event, for example, the creation of the order, or the insertion of invoice details
Move #
System-assigned ID for the movement
Segment #
System-assigned ID for the trip segment
Viewing trip changes associated with an asset
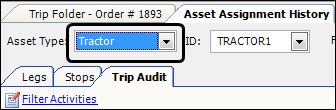
You can access the Trip Audit tab in the Asset Assignment History window to view changes made to various trips that are associated with a specified asset.
-
Go to View > Assignment History.
The Asset Assignment History window opens. -
In the Asset Type drop-down, select the desired asset type.
-
Enter the asset ID into the ID field.
-
To limit the data retrieved, adjust the From date or the To date.
-
Click Open.

-
Select the Trip Audit tab to view the results.
Filtering data on the Trip Audit tab
In the Trip Audit Activities window, you can:
-
View a list of all the types of information that is tracked
-
Set filters to manage what data displays on the Trip Audit tab
| Filters created with the Filter Activities feature are saved to the specific user’s profile. Each user could use different filters. |
Use this procedure to filter data that displays on the Trip Audit tab.
-
Do one of the following:
-
Retrieve an order or trip in Trip Folder
-
Select an asset in the Asset Assignment Window
-
-
Select the Trip Audit tab.
-
Select
 Filter Activities.
The Trip Audit Activities window opens.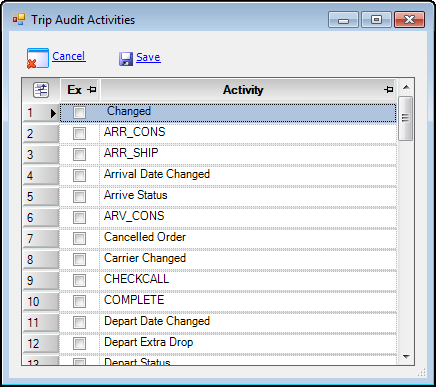
-
Locate the activity or activities you want to exclude from the list, and select the Exclude checkbox.
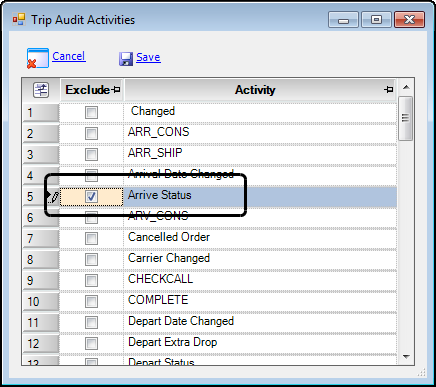
-
Click
 Save.
Save.
The Trip Audit tab will update and hide the selected activities.Note: You can click
 Cancel to close this window without saving your changes.