Consolidating orders on a movement
TMW Operations allows you to combine multiple orders onto a single movement. A consolidated trip can be an efficient use of resources when the stops for two or more orders can be made on the same route. The orders can be completed successively or concurrently if trailer capacity is sufficient.
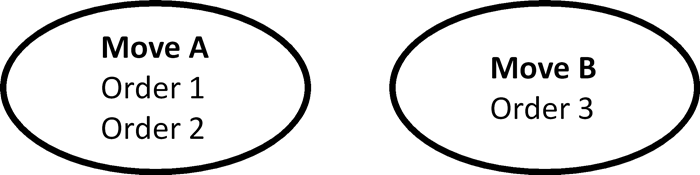
When you consolidate orders in TMW Operations, the system places the focus on movements, rather than individual orders. For example, suppose you have two movements: Move A (includes Order 1 and Order 2) and Move B (a single order, Order 3).
In TMW Operations, you can consolidate these movements.

![]() See it in action - Consolidating orders in the Trip Folder
See it in action - Consolidating orders in the Trip Folder
![]() See it in action - Consolidating orders in the Planning Worksheet
See it in action - Consolidating orders in the Planning Worksheet
Setting up your system for consolidation
Several TTS50 settings allow you to customize how your system consolidates orders.
-
[Dispatch]AllowConsolidationOnCompletedOrders
Determines whether orders with a status of Completed can be consolidated -
[Dispatch]AutoRecalcTimes
Determines whether the system automatically recalculates arrival/departure times when you make changes to a trip -
[.NetOperations]ConsolidationLogicOption
Determine the default stop sequence when two or more orders are consolidatedNote: You can still resequence stops manually after the consolidation takes place.
Accessing Consolidation Manager
You use Consolidation Manager to consolidate orders and to edit existing consolidations. This feature is available in:
-
Trip Folder
-
Planning Worksheet
-
Trip Planner
-
Load Builder
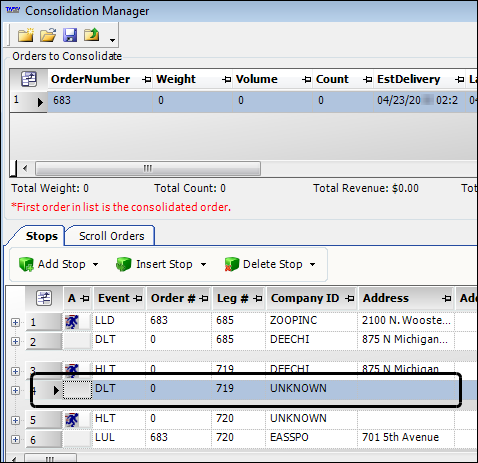
The Consolidation Manager window contains two grids: the Orders to Consolidate grid and the Stops grid.

The Orders to Consolidate grid displays information for each order consolidated on the trip. Each order is displayed on a separate row, with the source order listed first.
The Stops grid displays the stops from each order in the Orders to Consolidate grid. By default, stops are grouped together by order. However, you can manually re-order the stops. For information on re-ordering the stops, see Resequencing the stops on consolidated orders.
To access Consolidation Manager, do one of the following:
-
In Trip Folder, Planning Worksheet, and Load Builder
Go to Edit > Consolidate/Unconsolidate > Consolidation Manager. -
In Trip Planner
First available in TMW Operations: Version 15.10.073Add the Consolidation Manager command to a menu or toolbar. For details, see Adding a command to a toolbar.
Consolidating two or more movements
When you consolidate orders, you combine two orders into a single movement. If you are consolidating to a split trip, the system allows you to select the trip segment to which you are consolidating.
To consolidate movements, follow these steps:
-
Open an order in Trip Folder or select an order in Planning Worksheet or Trip Planner.
Notes:
-
This order will be the source order.
-
For the consolidated order, the system will retain this order’s move number.
-
How the system handles asset assignments and the trip segment number depends on whether the source order contains a split trip:
-
If the source order is not a split trip
The system will retain the trip segment number and asset assignments of the order.
-
If the source order is a split trip
The system will retain the trip segment number and asset assignments of the trip segment to which you consolidate.
-
-
If you want to consolidate multiple orders that originate from the same location, consider using Load Builder. For more information, see Consolidating orders using Load Builder.
-
-
Do one of the following:
In Planning Worksheet
Go to Edit > Consolidate/Unconsolidate > Consolidation Manager.
In Trip Folder
Go to Edit > Consolidate/Unconsolidate > Consolidation Manager.
Note: You can use the Add Order button on the extended Stops button set to consolidate orders. For information about setting up and using the extended Stop buttons, see Working with the extended set of Stop buttons.
In Trip Planner
First available in TMW Operations: Version 15.10.073
Select the Consolidation Manager command.
Note: You must first add the Consolidation Manager command to a menu or toolbar. For details, see Adding a command to a toolbar.
The Consolidation Manager window opens.
-
If the order is a split trip, select the trip segment to which you want to consolidate the order, on the Stops tab.
Note: The ability to select a trip segment was first available in TMW Operations: Version 15.30.74.
-
If you know the order number of the order you want to consolidate:
-
Click Add Order.
The Add Order window opens. -
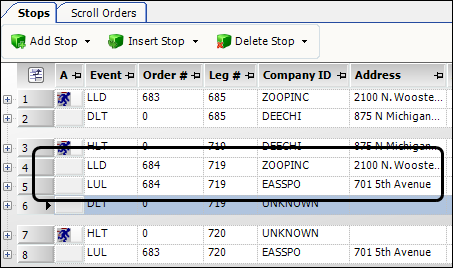
Enter the order number you want to consolidate, then click Add.
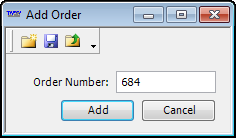
The system adds a new row in the Orders to Consolidate grid and adds the stops to the Stops grid.
Note: The system will not allow you to add an order that has a status of Cancelled.
Repeat this step for each additional order you want to consolidate. Then go to Step 6.
-
-
If you do not know the order number of the order you want to consolidate:
-
Click the Scroll Orders tab at the bottom of the window.
-
Do one of the following:
-
Click Refresh.
-
Click Restrict and use the selection criteria to find the order(s) you want to consolidate. When you are finished, click Retrieve.
The results are displayed in a grid.
-
-
Select an order and drag it onto the Orders to Consolidate grid.
-
Repeat Steps b and c as needed.
Note: The system will not allow you to add an order that has a status of Cancelled.
-
-
Resequence the stops as needed in the Consolidation Manager window’s Stops grid.
-
Click
 Save.
Save. -
Close the Consolidation Manager window.
Viewing consolidated trip information
When you consolidate trips, the consolidated trip information appears in different locations. This depends on whether you are using Trip Folder, Planning Worksheet, or Trip Planner.
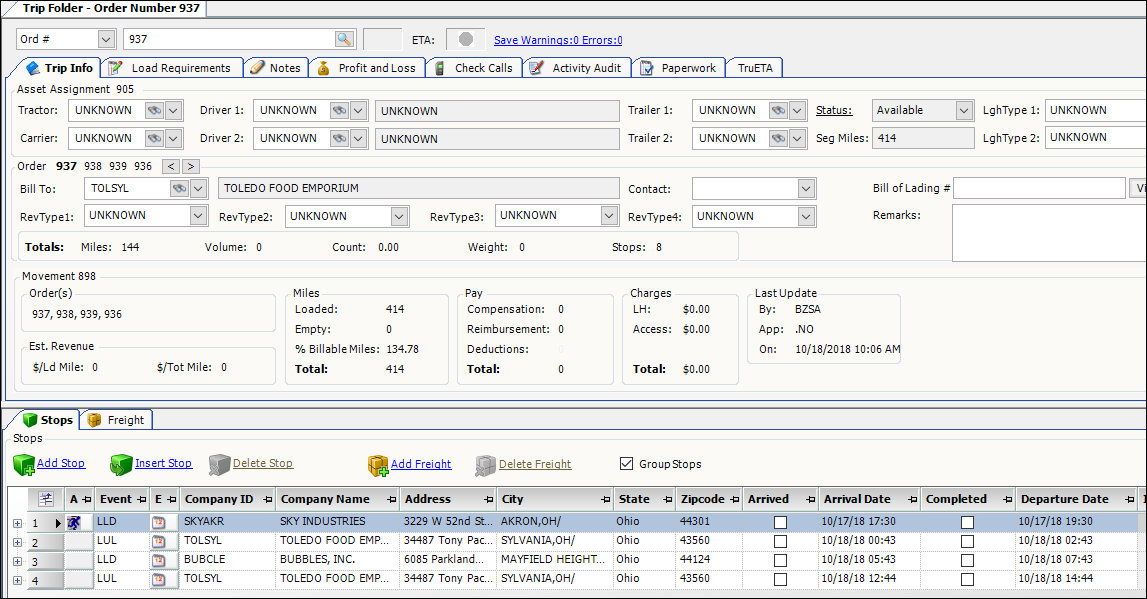
Trip Folder
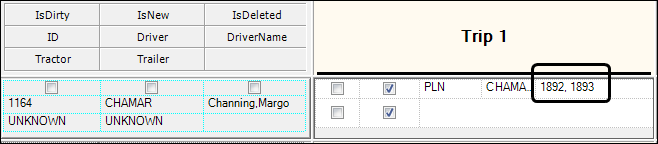
Trip Folder displays consolidated order information in the Movement pane.

Trip Folder also displays individual order information in the Order section. You can use the arrow buttons to toggle between the consolidated orders. The number of the selected order appears in bold, and the associated order information is displayed in the fields in the Order section.
![]()
|
Even though the example consists of three orders, it is possible for a trip to include many orders. Clicking on the order number in the Order section (next to the arrow buttons) will not switch between orders. However, you can click on a stop in the Stops grid to determine the associated order number. The order number will appear in bold font. |
Planning Worksheet
In the Planning Worksheet, only the last order added to the consolidation is shown in the Available Trips grid. The system hides all the other orders added to the consolidation.
The OrdCnt field displays the number of orders on the trip. By default, it is not immediately in view. You can either scroll or use the Field Chooser to move the field into view.
-
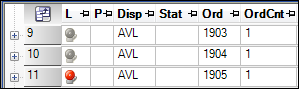
Before consolidation
Each order has its own row on Planning Worksheet.
-
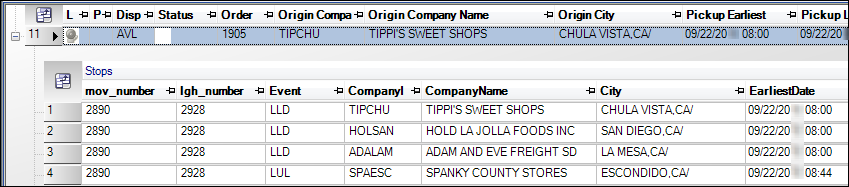
After consolidation
Only order 1905 appears, since it was the last order selected for consolidation. Note the change in the OrdCnt field.

To view the orders and stops on a consolidated trip, click  Expand next to the trip’s row number.
Trip Planner
In Trip Planner, only the final order added to the consolidation appears in the Trips grid. The system hides all the other orders added to the consolidation.
The OrdCnt field displays the number of orders on the trip. By default, it is not immediately in view. You can either scroll or use the Field Chooser to move the field into view.
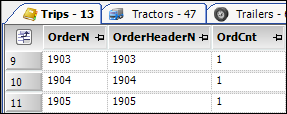
Before consolidating these orders, each order has its own row in the Trip Planner.
![]()
After consolidating the orders, only order 1905 appears, since it was the last order selected for consolidation. Note the change in the OrdCnt field.
You can also use the Cell Designer to add the Orders field to the Assignment Plan cell layout. When you assign a consolidated trip to a driver, all of the order numbers will appear in the Assignment Plan pane.
Resequencing stops on consolidated orders
By default, when you consolidate orders, the system groups stops by order. For example, suppose you have consolidated three orders and each order begins with a live load (LLD) and ends with a live unload (LUL). The system would sequence the stops in this way:
-
LLD (order A)
-
LUL (order A)
-
LLD (order B)
-
LUL (order B)
-
LLD (order C)
-
LUL (order C)
But suppose you want all the live loads to come first, followed by all of the live unloads. You can manually change the sequence of the stops, or you can configure your system to resequence stops automatically.
-
LLD (order A)
-
LLD (order B)
-
LLD (order C)
-
LUL (order A)
-
LUL (order B)
-
LUL (order C)
Hiding and moving duplicate stops in the Trip Folder
First available in TMW Operations: 2018.1
By default, the system displays each stop on a separate row. It also requires you to resequence stops manually. However, for easier viewing you can set up the system to hide (group) duplicate, sequential stops and have the system resequence them automatically.
Once you have hidden (grouped) duplicate, sequential stops, you can reorder each group within the Stops tab. When you move a group, the system moves all stops within that group together and resequences them accordingly.
Setting up the system to group and move stops
Sometimes when you consolidate multiple orders onto a single movement, you will have duplicate, sequential stops at the same location on the consolidated trip. To make it easier to view these trips in the Trip Folder, you can group (hide) duplicate, consecutive stop events that take place at the same location. Once grouped, you can move these stops together.
You must set several TTS50 settings to allow you to move and resequence duplicate stops automatically.
-
AutoRecalcTimes
Use this setting to have the system calculate or recalculate travel times and adjust the dates/times for stops automatically. -
StopsPanelGroupStopsEnabled
Use this setting to display the Group Stops checkbox in the Stops grid in the Trip Folder, Consolidation Manager, and Order Maintenance.When you select the Group Stops checkbox, the system hides duplicate, sequential events that occur at the same location.
Note: You can view the duplicate events by clearing the Group Stops checkbox.
-
StopsPanelGroupStops
Use this setting to have the Group Stops checkbox selected by default. -
[.NETMisc]StopsPanelGroupStops=YUse this setting to have the system resequenced stop times correctly when you move grouped stops.
Hiding duplicate stops
To hide duplicate stops:
-
In the Trip Folder, open an existing order with multiple, consecutive stops at the same location.
-
Verify that the duplicate stops are in consecutive order.
-
Select the Group Stops checkbox in the Stops tab header.
Note: The Group Stops checkbox is available only when the trip contains duplicate, sequential stops at the same location.
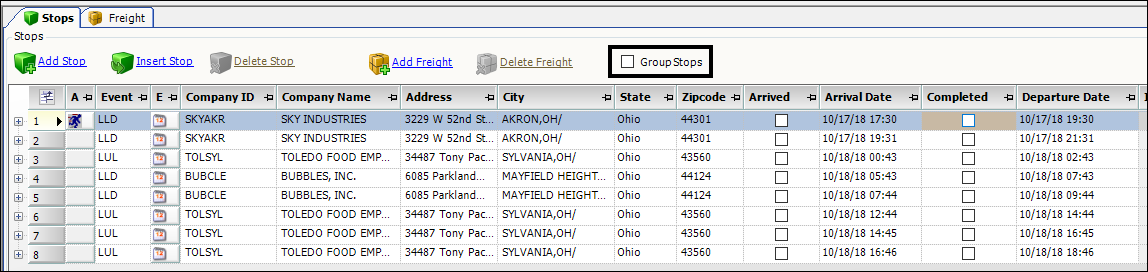
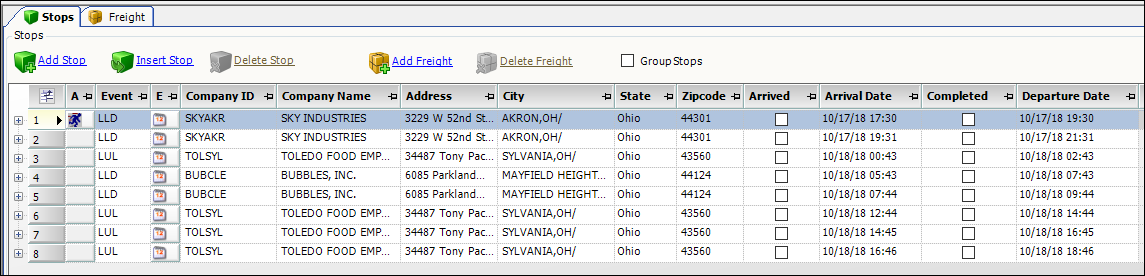
The list of duplicate stops collapses, showing only non-duplicate stops.

-
Clear the Group Stops checkbox to unhide the duplicate stops.
Moving grouped stops
To move grouped stops:
-
Open an existing order with multiple stops at the same location.
-
Verify that all duplicate stops are grouped in consecutive order.
-
Ensure that the Group Stops checkbox in the Stops tab header is selected.

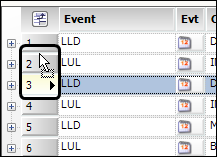
In the Stops grid, select the sequence number of the group you want to move, then drag and drop the group between the stops where you want it to go.
Note: When resequencing stops, arrival and departure dates/times may get out of sequence. When this happens, the Arrival Error and/or Departure Error fields will display an error icon. You must fix the conflicts before saving.

-
When you finish reordering the grouped stops, click Save.
Manually resequencing stops
To change the order of the stops manually, follow these steps:
-
Do one of the following:
-
Open an order in Trip Folder
-
Select an order in Planning Worksheet, Trip Planner, or Load Builder
-
-
Do one of the following:
-
In Trip Folder, Planning Worksheet, or Load Builder, go to Edit > Consolidate/Unconsolidate > Consolidation Manager.
-
In Trip Planner, add the Consolidation Manager command to a menu or toolbar, and then select the command.
-
-
In the Stops grid, click the sequence number of the stop you want to move, then drag it between the stops where you want it to go.
Note: When resequencing stops, arrival and departure dates/times may get out of sequence. When this happens, the Arrival Error and/or Departure Error fields will display an error icon
 . You must fix the conflicts before saving.
 -
When you are finished resequencing the stops, click
Save. -
Close the Consolidation Manager window.
Automatically resequencing stops
The [.NetOperations]ConsolidationLogicOption INI setting in your TTS50 allows the system to resequence consolidated stops automatically. The type of resequencing differs depending on the option.
-
SequenceByStopTimes
Resequences stops according to individual order times. -
SequenceByEventandCompany
Groups pickup and delivery stops together.
Even after the resequencing takes place, you can still change the stop order manually if desired.
|
Consolidating completed trips
Two separate features allow you to consolidate completed trips.
Consolidating two or more completed orders
If [Dispatch]AllowConsolidationOnCompletedOrders is set to Y, you can consolidate two or more completed trips using the Consolidation Manager. Use the procedure in Consolidating two or more movements.
| This feature is only available in Trip Folder. |
Consolidating an active order to a completed trip
The Consolidate to a Completed Trip feature allows you to consolidate an active order with the last completed trip for a tractor or driver. It is only available in Trip Folder and Planning Worksheet.
To consolidate an active order to a completed trip all of the following consolidation criteria must be met:
-
The tractor assigned to the order is also assigned to a completed trip.
-
That completed trip:
-
Has not been invoiced
-
Has a final trip segment that has not been settled
-
Consists entirely of completed trip segments (if it represents a consolidation of two or more orders)
-
To consolidate to a completed trip, do the following:
-
Open an order in Trip Folder or select an order in Planning Worksheet.
-
Select Edit > Consolidate/Unconsolidate > Consolidate to a Completed Trip.
One of the following will occur:
-
If all consolidation criteria are met, the system opens the Order Consolidation window. The Tractor radio button is already selected when the window opens.
Note: The system provides the Driver radio button as an option to consolidate trips based on driver assignments.

-
If all consolidation criteria are not met, the system displays the Load Error message.
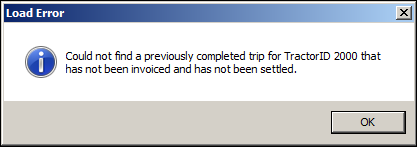
-
-
In the Order Consolidation window, do one of the following:
-
To consolidate trips based on tractor assignments, verify that the Tractor radio button is selected, review the completed trip information, and proceed to Step 4.
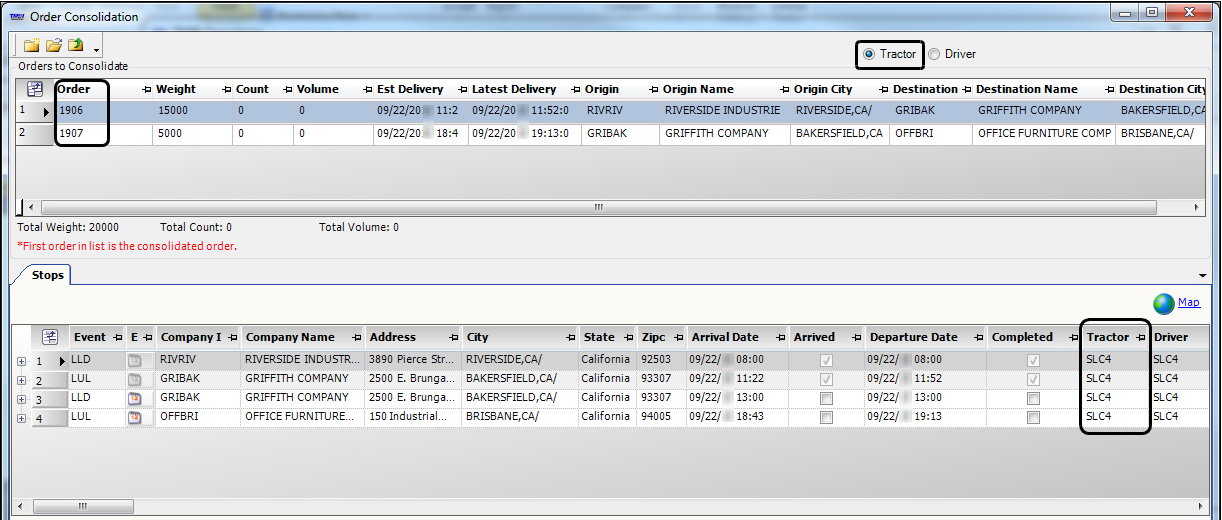
-
To consolidate trips based on driver assignments, select the Driver radio button, review the displayed information, and proceed to Step 4.

-
-
Resequence the stops as needed in the Order Consolidation window’s Stops grid.
Note: The system does not allow you to resequence the stops for the completed order.
-
Click
 Consolidate.
 -
Click Yes in the Save Changes box.
Removing orders from a movement
After consolidating orders, you may decide that one or more of those orders should not be included on the trip. There are several ways to remove consolidated orders.
-
You can remove individual orders from a movement in the Consolidation Manager window.
-
You can remove all orders from a movement at once. If desired, you can also remove all assigned resources or empty events.
| When you remove orders from a movement, the system assigns a new movement and trip segment number to each of the removed orders. |
Removing orders in the Consolidation Manager window
You can remove active or completed orders from a movement in the Consolidation Manager window.
-
Do one of the following:
In Trip Folder, Planning Worksheet, and Load Builder
Go to Edit > Consolidate/Unconsolidate > Consolidation Manager.
Notes:
-
When enabled, you can use the Extended Stops button set in Trip Folder to remove a consolidated order. See Remove Order in the Using the extended Delete Stop button section.
-
See Working with the extended set of Stop buttons for information about setting up and using the extended Stop buttons.
In Trip Planner
First available in TMW Operations: Version 15.10.073
-
Add the Consolidation Manager command to a menu or toolbar. For details, see Adding a command to a toolbar.
-
Select the command.
-
-
In the Orders to Consolidate grid, select the order you want to remove from the movement.
-
Click Remove Order.
The system displays a confirmation message.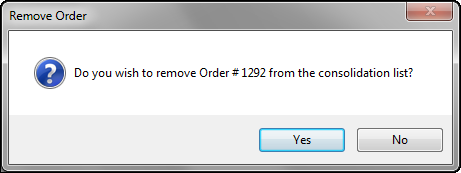
-
Click Yes.
The system removes the order from the Orders to Consolidate grid. -
Repeat Steps 2-4 for all other orders you want to remove from the movement.
-
Click
Save.Note: The system does not implement the changes until you click Save.
Removing orders using the Remove All Orders commands
In Trip Folder, Planning Worksheet, and Load Builder, you can remove active orders from a movement using any of the following menu options.
-
Remove All Orders From Movement
This option allows you to remove all orders from the movement. -
Remove All Orders and Assignments
This option allows you to remove all orders from the movement along with any assigned resources. -
Remove All Orders and Empty Events
This option allows you to remove all orders from the movement along with any non-billable empty events. -
Remove All Orders, Assignments and Empty Events
This option allows you to remove all orders from the movement along with any assigned resources and any non-billable empty events.
| You can only use the Remove All menu options to remove orders from a movement in which all of the orders are active. If any order in the movement has a status of Completed, you must use the Consolidation Manager window to remove orders. |
The following example demonstrates the use of the Remove All Orders From Movement command.
-
Open a consolidated order in Trip Folder, or select a consolidated order in Planning Worksheet or Load Builder.
-
Go to Edit > Consolidate/Unconsolidate > Remove All Orders From Movement.
The Remove Orders window opens. -
Do one of the following:
-
Remove individual orders
-
In the Orders on Move pane, select the order you want to remove from the movement.
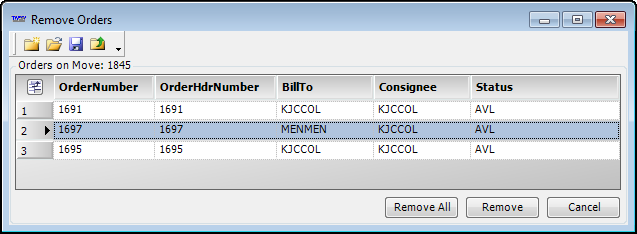
-
Click Remove.
The system displays a confirmation message. -
Click Yes.
The system displays a message indicating that the order has been removed. -
Repeat Steps a-c for each order you want to remove.
-
-
Remove all orders
-
Click Remove All.
The system displays a confirmation message. -
Click Yes.
The system displays a message indicating that the orders have been removed. -
Click OK.
-
-
-
Click
Save.
| The system does not implement the changes until you click Save. |