Transferring 214 data into a flat file
Each 214 flat file contains electronic update data from your database. Flat files are sent to your internal or external mapping service, which forwards the 214 to your trading partner. If you are licensed for the EDI 214 Shipment Status SmartLink add-on, you can create 214 flat files manually from the Planning Worksheet or Trip Folder. If you are licensed for the Auto 214 Scheduler, you can set up the system to transfer data automatically from your database into 214 flat files.
Before your mapping service can send 214s, you must extract the data from your TMWSuite database and create the flat files. There are two methods for transferring 214 data from the database and exporting it into a flat file with EDI 214 Shipment Status SmartLink.
-
If you are licensed for EDI Scheduler, you can set up the system to transfer the data to a 214 flat file at a required interval.
Note: Load Tender SmartLink 2.0 is an add-on application that requires a separate license. For more information, contact Trimble Sales at 216-831-6606.
Manually transferring 214 data
You can manually transfer 214 data that is stored in the database into a 214 flat file. You do this from the Planning Worksheet or Trip Folder.
-
Select the order in the Planning Worksheet or Trip Folder.
-
Go to Edit > EDI > Transfer EDI 214.
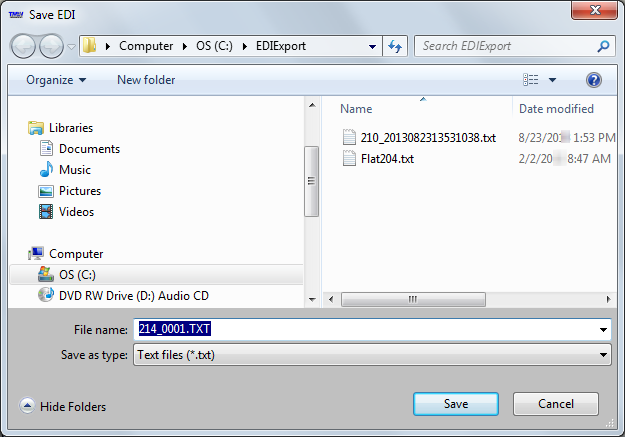
When there is 214 data to be transferred, the Save EDI window displays the flat file name in the File name field.
-
If necessary, go to the correct folder and enter a different file name.
Notes:
-
Verify that a file with the same name does not already exist in the selected folder. If it does, alter the file name to make it unique.
-
To set up your system to default to the EDI folder, contact your company’s network administrator.
-
If there is no data to be sent, a message is displayed. It states, "There is no EDI data to extract." Click OK to close the message.
-
-
Click Save.
-
If the transfer is successful, a message indicates that the extraction to flat file is complete. Click OK to close the message.
Reviewing Auto-214s that are On Hold
You can set requirements for Auto-214 activities for each trading partner. For example, you can require the trailer ID to be identified, or a reason to be provided for a late arrival. An Auto-214 must meet all the requirements to be sent. Those that fail are placed in the Auto 214 Hold queue.
If you are set up to maintain sequencing, subsequent Auto-214s for a trading partner are also placed On Hold until the Auto-214 that failed to meet a requirement is corrected.
Follow these steps to review and correct your On Hold 214s.
-
Do one of the following:
-
In the Trip Folder, go to Edit > EDI > View Auto 214 Hold Records.
-
In the Planning Worksheet, click the
 EDI tab at the right side of the window. Then, go to Edit > EDI > View Auto 214 Hold Records.
-
-
Use the filter options at the top of the EDI Auto 214’s on Hold window to display On Hold 214s for a specific trading partner, shipper, revenue type, or date range.
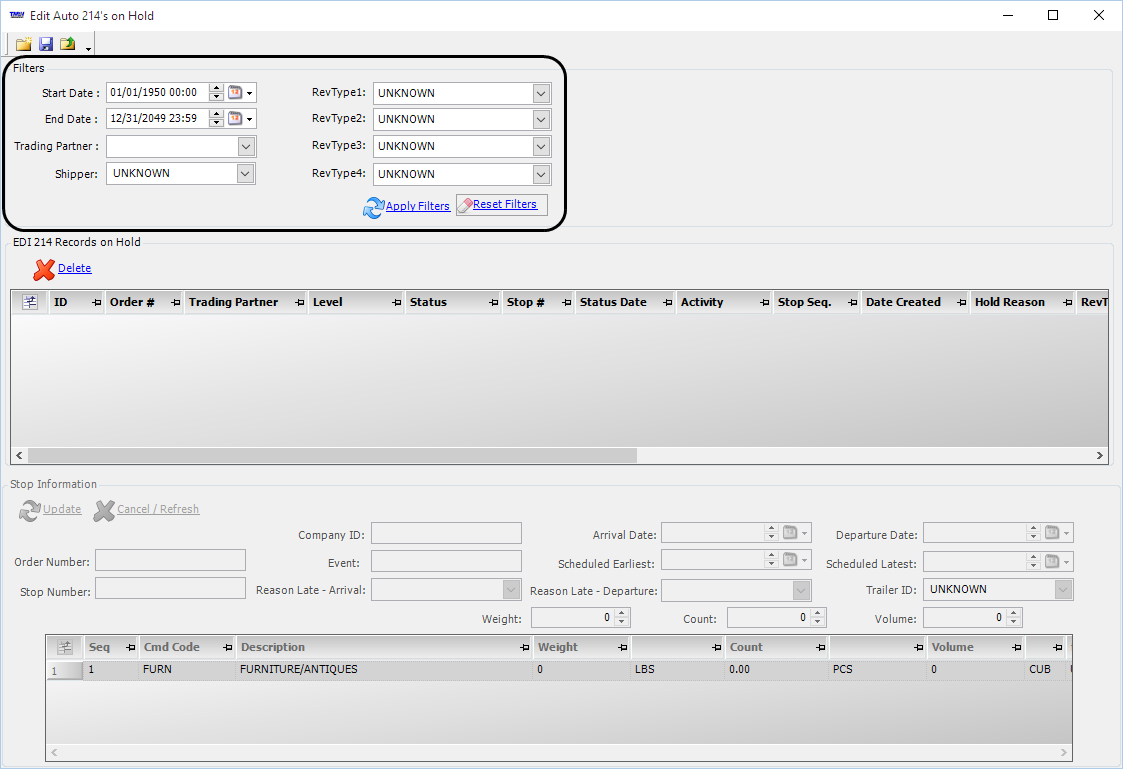
Note: If you leave the Trading Partner field set to UNKNOWN, the window displays the On Hold 214s for all trading partners for the specified shipper, revenue types, or date range.
-
Click Apply Filters to retrieve the On Hold 214s.
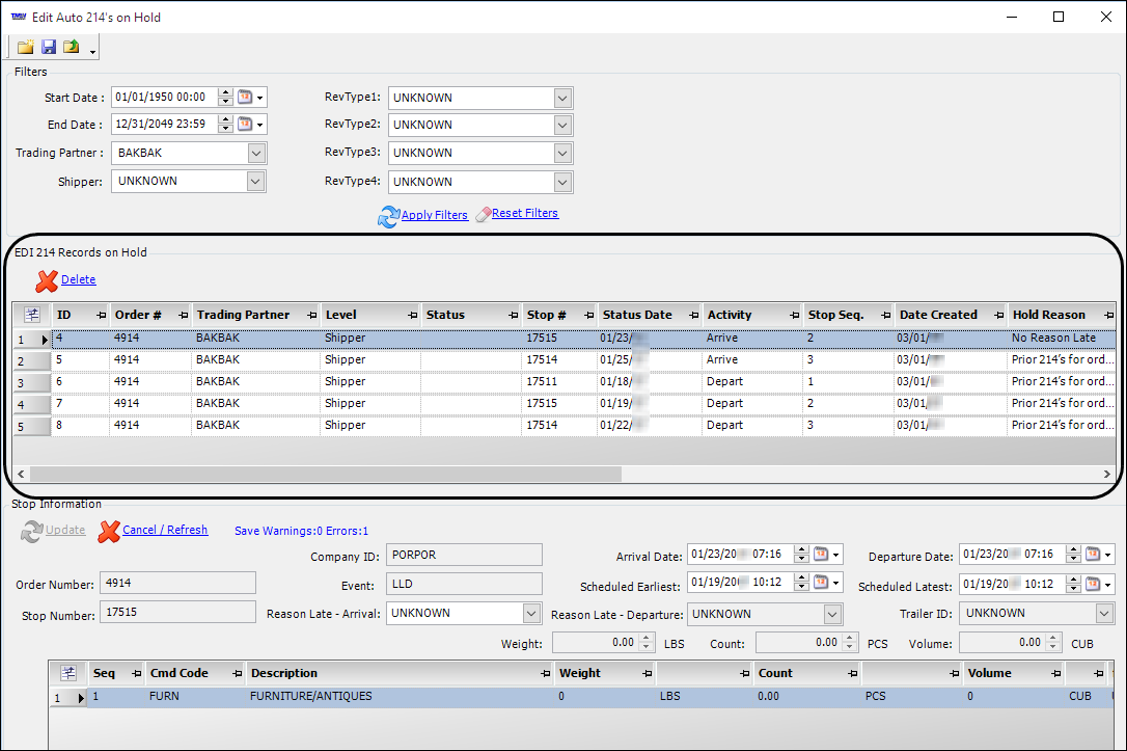
Note: If you are set up to maintain sequencing for Auto-214s, the retrieval list may contain records with Prior 214’s for order held in the Hold Reason field. Do not edit these records. They will be handled when you correct the record that caused them to be placed On Hold.
-
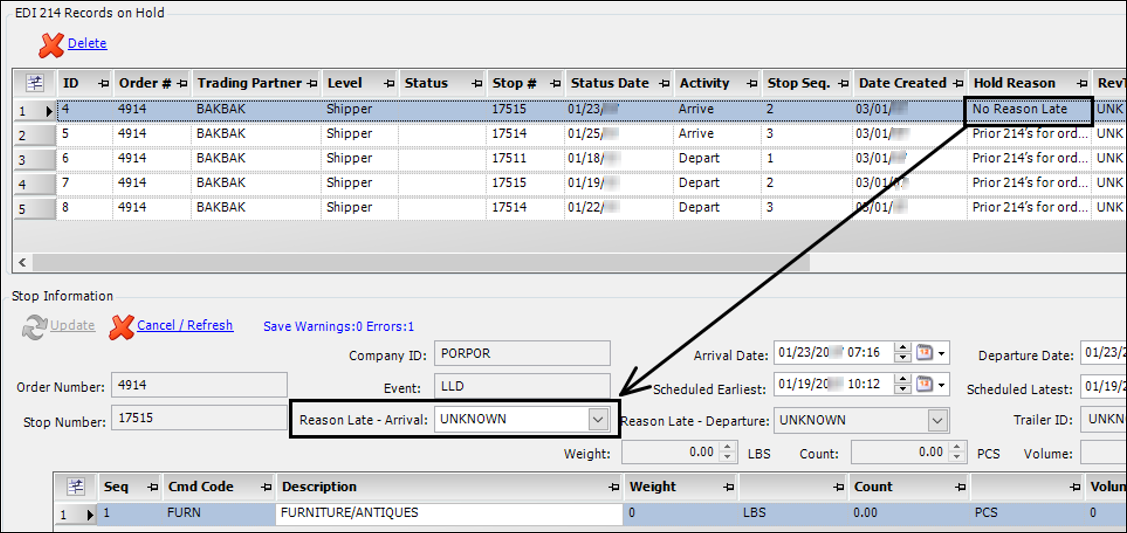
In the EDI 214 Records on Hold section, select a record with a Hold Reason other than Prior 214’s for order held.
The fields in the grid at the bottom of the window are controlled by the requirements identified in the EDI Codes Maintenance window’s Auto 214 tab. You use these fields to make any necessary corrections.
-
Make all needed entries and click Update.
-
Click
 Close to exit the window.