Working with security cards
If your company uses Comdata, EFS, or TCH as its electronic data provider, you must set up a security card for each user who will update or modify card and advance information. You can also set up a single security card to be shared by a group of users.
Security cards are required for all of the following tasks:
-
Accessing the Card Maintenance window
-
Accessing fuel transactions, electronic checks, and card advances in the Advances/Misc Labor window
-
Using any interactive functionality
-
Creating pay details for the following system code pay types:
-
Card Advance (LDMNY)
-
EFS TransCheck (TRNCHK)
-
EFS UniversalCard (UNVCRD)
-
Express Check (EXPCHK)
-
TCH Money Codes (TCHMC)
-
The Security Cards feature allows you to assign security cards to users or groups.
To add or remove a security card, follow these steps.
-
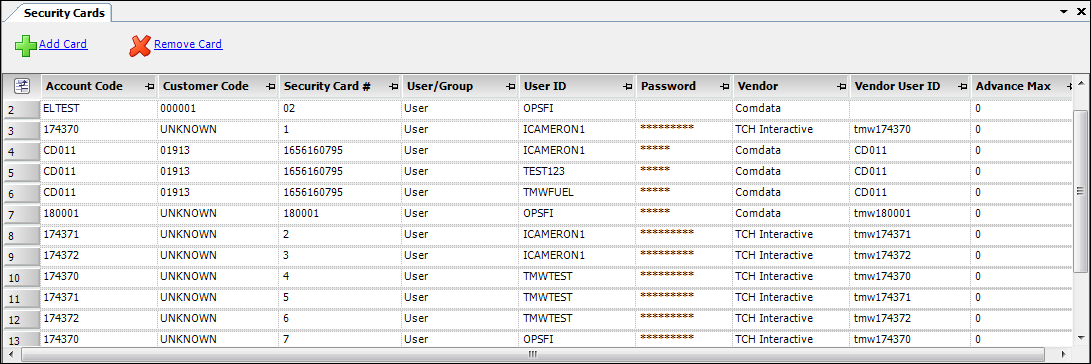
Go to Operations > Fuel Maintenance > Security Cards.
The Security Cards window opens.Required field: *
Field Definition Account Code
Account code for the user or group
Customer Code
Customer code associated with the account code
Security Card *
User’s unique Comdata, EFS, or TCH user ID
User/Group
Indicates whether this security card is for a single user or for all users in a group
User ID *
TMWSuite ID of the user or group
Password
Password assigned to your company by your vendor for verifying Express Cash Batch data
Vendor
Vendor for which you are setting up the security card
Vendor User ID
ID used to log into the vendor
Advance Max
Custom field
-
Do any of the following:
-
Add a card
-
Click Add Card.
A new row appears at the bottom of the grid. -
Enter information in the columns provided.
-
-
Edit an existing card
-
Click on the row that contains the card you want to edit.
-
Make changes as needed.
-
-
Remove a card
-
Click on the row that contains the card you want to remove.
-
Click Remove Card.
-
-
-
When you have completed all edits, click
 Save.
Save.