Using enhanced mileage features in the Manage Mileage Table
The mileage lookup feature uses address information to calculate the mileage between each stop.
The enhanced mileage features ensure that a trip route identifies all the jurisdictions through which a load must travel.
Setting up enhanced mileage features
To load state miles into the Manage Mileage Table window, the DistanceCacheByState General Info Table setting must have a String1 value of Y.
When you use the enhanced mileage features, the DistanceCacheOneWay General Info Table setting must have a String1 value of Y. This allows for:
-
Recording separate mileage values for each stop on a trip.
-
Determining how the system will calculate the mileage for each stop on a trip. This ensures correct mileage for billing purposes.
-
Enforcing the origin and destination pair remains as assigned on the Manage Mileage Table window.
To enable the system to generate routing directions using the Manage Mileage Table window, the DistanceCacheRouting General Info Table setting must have a String1 value of Y.
Viewing enhanced mileage information for each location on a route
Use the Manage Mileage Table window to view the mileage, road class, and road restriction type for each location on a route.
-
Go to Operations > Maintain Mileage Table.
The Manage Mileage Table window opens. -
In the Origin field, select the appropriate starting location.
-
In the Destination field, select the appropriate destination location.
-
In the Max Mileage Types field, enter the maximum number of mileage buckets (listed in your TTS50) that you want to look up and calculate.
Notes:
-
This field defaults to 1.
-
The system will only process the number of mileage types listed in the Max Mileage Types field, and will process them in the order they appear in the TTS50. For example, if you have 30 mileage types in your TTS50, but set the Max Mileage field to 10, the system will only process the first 10 mileage types.
-
We recommend that you only set the field for the number of mileage buckets needed. A higher bucket count can result in slower processing time.
-
-
Click Retrieve.
Results appear in the grids.
Viewing the states passed through on new routes
Where applicable, include the State Miles Type 1 information for the road class for each jurisdiction listed, and include the State Miles Type 2 road restriction for each jurisdiction. ALK’s PC*Miler | Streets version 17 or higher supports state miles functionality.
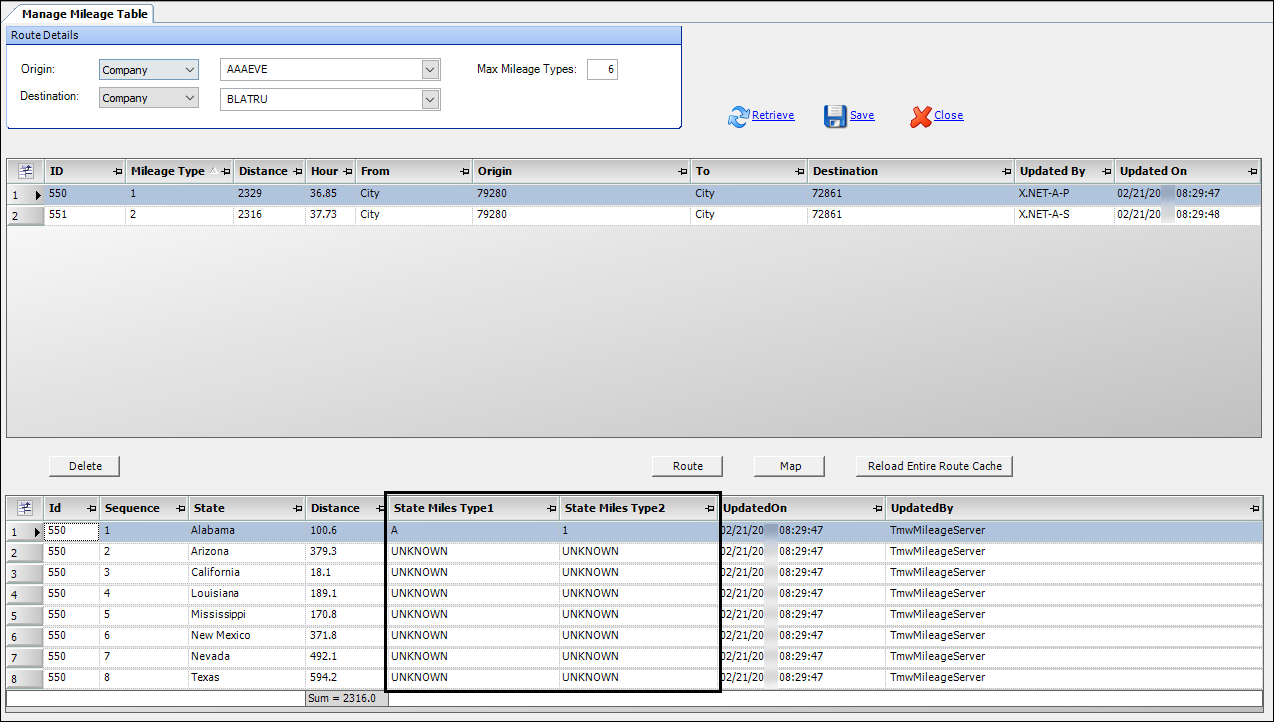
The DistanceCacheByState General Info Table setting must have a String1 value of Y to function with the enhanced mileage features to record the mileage for each state/province on a route.
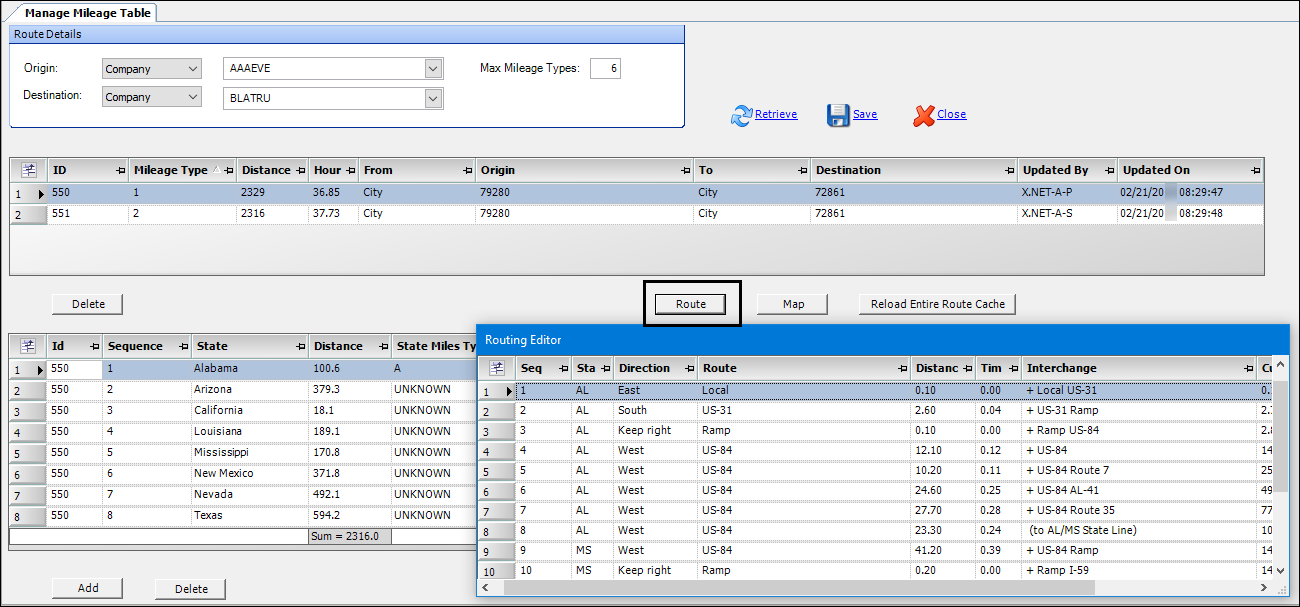
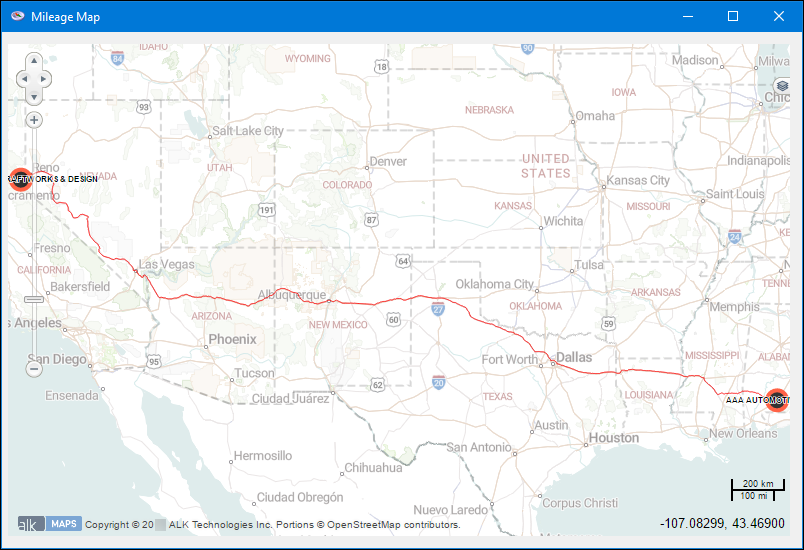
Generating routing information
The system can provide editable, point-to-point routing directions along with a map through the Manage Mileage Table window.
Click Route to view turn-by-turn editable directions on the Routing Editor window.
Click Map to view a map of the route on the Mileage Map window.
Removing mileage type listings
If you want to remove mileage listings from the grid, follow these steps.
-
Click on the row you want to remove.
-
Click Delete. The system removes the row from the grid, along with associated references to State Miles, Mileage Table, and Routing Directions associated with that row.
| To re-insert the row(s) removed from the grid, click Retrieve. The system recalculates and re-inserts the deleted mileage type. |
Reloading all mileage type listings
| If you reload all mileage type listings, the system will overwrite all retrieved listings appearing in the grid. |
To delete and recalculate all mileage type listings, follow these steps.
-
Click Reload Entire Route Cache.
-
When the Reload Route Cache warning message appears, click Yes to overwrite data appearing in the grid.
The system reloads data with a new ID for each mileage type listed.