Issuing pay for a trip
You can create pay details for a resource in TMW Operations. However, the system will not finalize the pay until you actually settle the trip.
Use the Vendor Charges section of the Profit and Loss tab to create pay details. This tab is available in both Order Maintenance and the Trip Folder.
When you use the Profit and Loss tab to issue pay for a trip, you can create pay details for a single resource, or for multiple resources.
You can use one or both of the following methods to create details:
-
Manual entry of pay details
-
Automatic calculation of pay based on rates previously set up in TMW’s Rate Schedules application
In some cases, it may be necessary to use both rating options for the same trip. For example, you could use the Compute Pay command to calculate the line haul pay and secondary pay automatically. You could then use the Add Pay command to add other pay manually, such as detention pay.
|
The Vendor Charges section of the Profit and Loss tab is shown here.
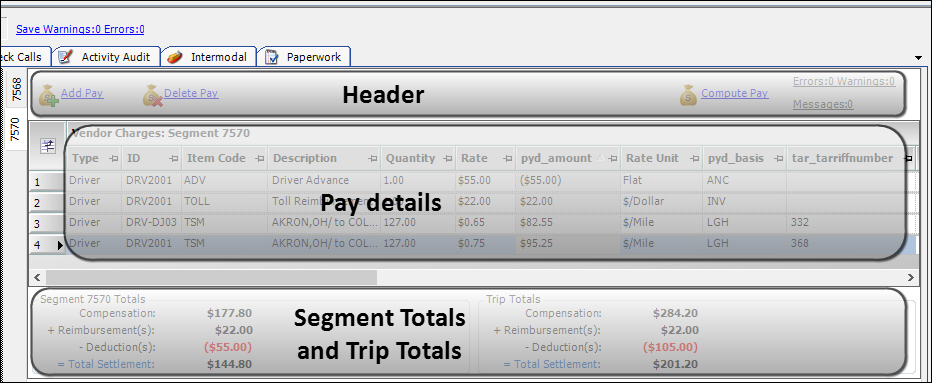
Header section
The following buttons are displayed at the top of the Profit and Loss tab.
Add Pay |
Adds a blank pay detail at the end of a list of pay details |
Delete Pay |
Removes a selected pay detail |
Compute Pay |
Calculates pay for the resources assigned to the currently displayed trip segment based on rates set up in TMW’s Rate Schedules application |
Pay details
Pay details appear in the middle of the Vendor Charges section. Some of the most important columns are defined below.
| You can use the Field Chooser to add or remove columns as needed. |
Frequently, the default column names in the application’s data grids are the same as the column names in the database table. However, sometimes they differ when the database names are long or difficult to understand.
This list shows the default column names as they appear in the user interface. When the user interface name is different from the database name, the database name is shown in parentheses below the user interface name.
You can view a column’s default name and database name by right-clicking on the name in the column header. For more information, see Renaming columns in a grid layout.

| Field | Definition |
|---|---|
Type |
Resource type: Driver, Tractor, Trailer, Carrier, or Third Party |
ID |
Unique ID code for the resource |
Item Code |
Description of the pay type on which the pay detail is based Notes:
|
Description |
Description of the pay type selected in the Item Code field |
Quantity |
Rating quantity, i.e., the number by which the rate is multiplied to calculate the pay |
Rate |
Per-unit pay amount |
Amount |
Read-only field. The amount paid. The system automatically multiplies the Quantity times the Rate and displays the total in this field. |
Rate Unit |
Calculation method used for the pay detail (for example, Flat, $/Mile, $/Piece, and so on) |
Basis Unit |
Type of measurement on which the rate is based, for example, Flat, Distance, or Weight |
tar_tarriffnumber |
Unique ID assigned to the rate (tariff) used to calculate this pay detail |
pyd_basis |
Pay type’s basis:
|
pyd_fixedQty |
When selected, the quantity is frozen (fixed) and will not be changed in settlements. |
pyd_fixedRate |
When selected, the rate is frozen (fixed) and will not be changed in settlements. |
pyd_fixedAmt |
When selected, the quantity, rate, and amount are frozen (fixed) and will not be changed in settlements. |
Segment Totals and Trip Totals
The bottom of the Vendor Charges section displays total pay for the trip segment and for the trip.
-
If a trip has a single segment, the dollar amounts in the Segment Totals and Trip Totals columns are identical.
-
If a trip has multiple segments, the Trip Totals column displays the summed pay details for all segments.
| Field | Definition |
|---|---|
Compensation |
Total pay amount |
Reimbursement(s) |
Total reimbursements |
Deduction(s) |
Total pay deductions |
Total Settlement |
Net pay, calculated as: Compensation + Reimbursements - Deductions = Total Settlement |
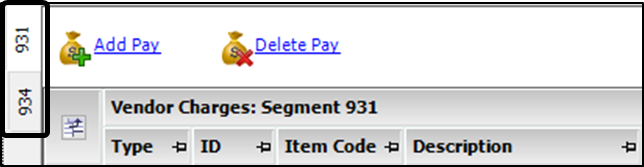
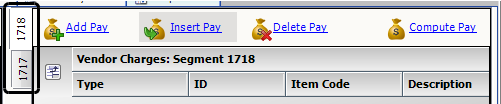
Trip segment numbers
The trip segment number appears in a sub tab along the left side of the Vendor Charges section. If a trip includes multiple segments, a sub tab appears for each segment. Select a sub tab to display the pay details for that trip segment.
Creating pay details
To create pay details for a trip, follow these steps.
-
In the Trip Folder or Order Maintenance, display the trip.
-
Select the Profit and Loss tab.
-
If the trip has more than one segment, select the trip segment’s sub tab at the left side of the Vendor Charges section.
-
Create a pay detail:
-
To create pay automatically, click Compute Pay.
Detail lines for the matching line haul rate and any linked secondary rates are added to the Vendor Charges grid.
Note: If multiple payable resources are assigned to the trip, the system calculates pay for each payable resource.
-
To enter pay manually:
-
Click Add Pay.
A blank detail line is added at the bottom of the Vendor Charges grid.
-
Select the ID for the resource.
-
Select the pay type’s Item Code.
-
Enter the Quantity and Rate.
-
-
-
Repeat Steps 3-4 for each segment on the trip.
-
Click
 Save.
Save.
| To remove a pay detail, select it and then click Delete Pay. |