Recording and reviewing check calls
In TMW Operations, a check call is a record that lists a resource’s location at an exact date/time during a specified event. For example, the following information could be included in a check call record:
-
At 2:00 p.m. on June 14th 20XX,
-
Driver Matt Jones,
-
Was in Cleveland, Ohio.
-
The check call event was a Voice Call.
Note: When selecting an event for a check call, you can choose from a list of common events that are preprogrammed into the feature. Or, as needed, you can easily set up additional check call event types in the CheckCallEvent label.
You can access check call information in two places:
-
The Check Calls window.

To access the Check Calls window, select Operations > Checkcalls.
-
The Check Calls tab, located within the Trip Folder.
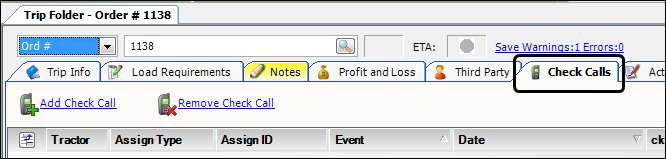
Check call data can be used for trip planning and to calculate the remaining travel time to a stop for an estimated time of arrival (ETA).
The system retains a log of all check calls. These check call records can be retrieved in the Check Calls window either by resource or by trip.
A check call may be recorded in one of two ways:
-
When a resource checks in, the dispatcher can record the call manually.
-
If your company uses TMW’s TotalMail interface with your mobile communications system, check calls are recorded automatically each time a GPS (global positioning system) sighting is received.
Note: For more information, refer to your TotalMail documentation.
Understanding the layout of the Check Calls window
The Check Calls window allows you to perform all the tasks related to check calls from a single location.
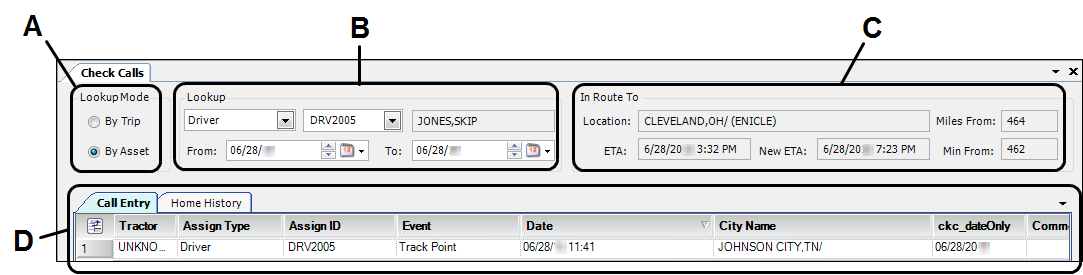
A |
Use this pane to specify the mode by which you look up or record check calls. Options are:
Notes:
|
B |
|
C |
When the trip associated with the check call has a dispatch status of Started, ETA information for the trip is displayed in this pane (read-only). Information is displayed in these fields:
For more information, see Computing the next stop’s ETA from a driver check call. |
D |
Check call sub tab section Displays check call records. The layout of this section is determined by the asset type selected in the Look up pane section. For more information, see Check calls - Sub tabs. |
Check calls - Command buttons
Use the command buttons in the toolbar to quickly accomplish tasks.
|
Open |
Display check call records for the specified resource |
|
Save |
Save your entries/changes |
|
Close |
Close the window |
|
Set Driver Domicile |
Specify that the currently selected check call on the Call Entry tab represents the driver’s home location |
|
Update Leg |
Currently not functional |
|
Add |
Add a new check call record |
|
Delete |
Delete a selected row |
|
About |
Display the About window |
|
Exit Application |
Close TMW Operations |
Check calls - Sub tabs
In the Check Calls window, two sub tabs are shown. They allow you to view and add check calls for drivers, tractors, trailers, and carriers, and to record at-home history for your drivers.
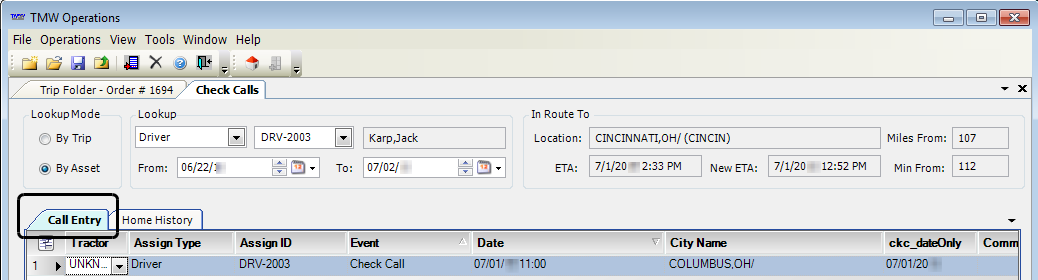
Call Entry tab
The Call Entry tab allows you to view and manually record check calls attached to:
-
Orders
When By Trip is selected in the Lookup Mode section. -
Drivers, tractors, or trailers
When By Asset is selected in the Lookup Mode section.
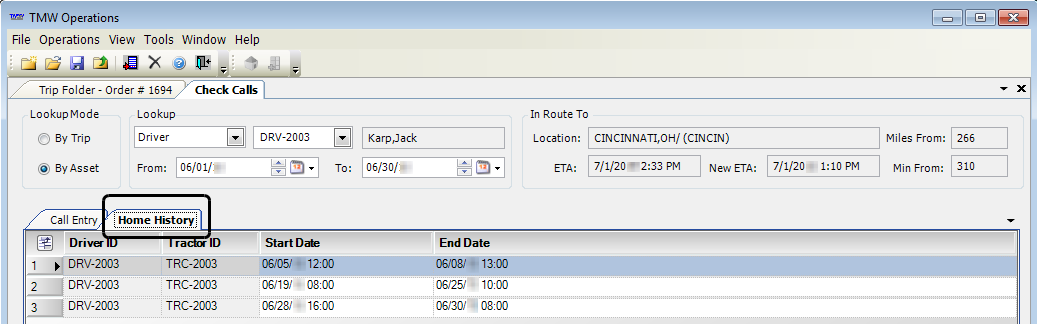
Home History tab
The Home History tab allows you to view and manually record the times your driver is at home. You can configure your system to work with TotalMail, so that your driver’s at home history is automatically entered into the system.
| The date a driver was last near home is also provided in the Last Home column in the Planning Worksheet’s Drivers grid. |
For more information on viewing and recording a driver’s home history, see Recording and viewing a driver’s home history.

Setting up the Check Calls window
Two setup options allow you to modify the Check Calls window based on the way you usually use the window. You can set defaults for:
-
Lookup mode
-
Event type
Specifying the default lookup mode
You have the option of searching check calls by trip (order number) or by asset (driver, tractor, trailer, or carrier). You use the [Dispatch]CheckCallMode setting in your TTS50 to determine which option is selected by default.
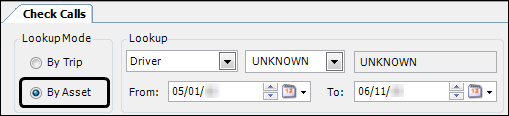
If you have the default value CheckCallMode=Asset, the By Asset radio button is selected by default:
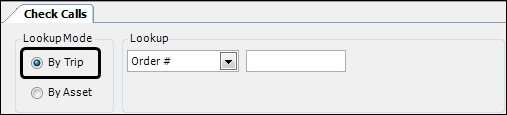
If you have the default value CheckCallMode=Order, the By Trip radio button is selected by default:
Specifying the default event type
First available in TMW Operations: Version 2018.1
By default, the system assigns the Track Point (TRP) event type to new check calls. In the CheckCallEventDefault General Info Table setting, you can specify that the system use a different default event.
| Values for the Event field are defined in the CheckCallEvent label in the label file. |
Creating, editing, and deleting check calls in the Check Call window
You can record, edit, and delete check call events for resources and orders. Order-based check calls can be accessed in the Check Calls window and the Trip Folder’s Check Calls tab. Resource-based check calls are accessed only in the Check Calls window.
| For information on creating, editing, or deleting check calls in the Trip Folder’s Check Calls tab, see Working with check calls in the Trip Folder on the Check Calls tab in the Trip Folder. |
To create, edit, or delete check calls in the Check Calls window, follow these steps:
-
Go to Operations > Checkcalls.
-
In the Lookup Mode pane, select the lookup mode:
-
By Trip
Select this option to record a check call for an order. -
By Asset
Select this option to record a check call for an asset.
Note: Use the
[Dispatch]CheckCallModesetting to set a default option. -
-
In the Lookup pane, do one of the following:
-
If you are using the By Trip mode, enter the order number.
-
If you are using the By Asset mode, do the following:
-
In the first field, select Driver, Tractor, Trailer, or Carrier.
-
In the second field, enter the resource’s ID.
-
If you are retrieving existing check call records, you can limit the retrieval to a specific date range by entering the beginning date in the From field and the ending date in the To field.

-
-
-
Click
 Open.
Open.
The system displays the assigned check calls.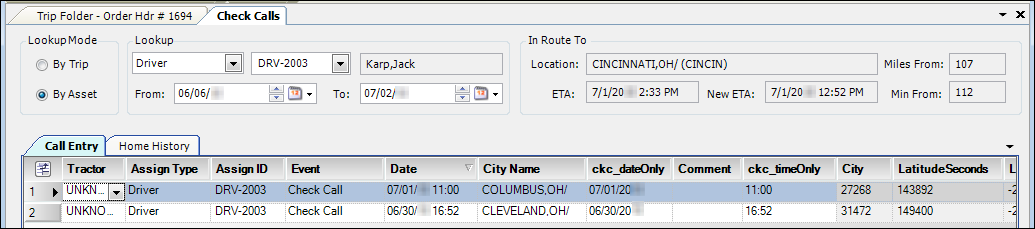
-
Do one of the following:
-
Click
 Save.
Save. -
Click
 Close to exit the window.
Add a check call
-
Click
 Add.
Add. -
Make entries in the following fields:
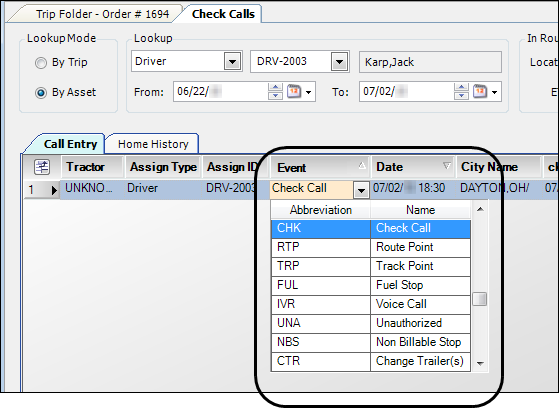
Field Definition Event
Select the appropriate event type from the drop-down list that appears when you click in this field. These options are created in the CheckCallEvent label.
Date
Enter the date and time when contact was made.
Note: This field defaults to the current date and time.
City Name
Enter the names of the city and state/province where the resource was located at the time contact was made.
Note: As soon as you make an entry in this field, the City, LatitudeSeconds, and LongitudeSeconds fields are automatically filled with the zip code and latitude/longitude coordinates for that city and state/province.
Comment
Enter a free-form message regarding the check call.
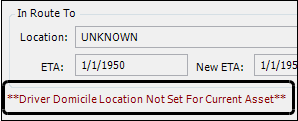
Setting a driver’s at home location
You set a driver’s domicile, or home location, in the Check Calls window. You can quickly tell whether or not a driver’s home location has been set. If it has not been set, the system displays a message under the In Route To pane.
Follow these steps to set a driver’s home location:
-
Go to Operations > Checkcalls.
-
In the Lookup Mode pane, select By Asset.
-
In the Lookup pane, make the following entries:
-
In the first field, select Driver.
-
In the second field, enter the driver’s ID.
-
-
Press ENTER or click
Open.
The system displays the assigned check calls. -
Do one of the following:
-
If an existing check call entry is the driver’s domicile location, select that row.
-
If none of the existing check call entries are the driver’s domicile location, create a new check call with his home location.
-
-
Click
 Set Driver Domicile.
The system displays a confirmation message.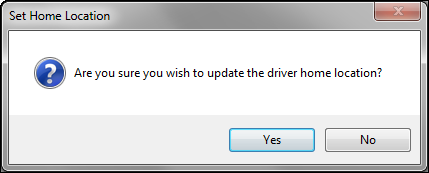
-
Click Yes.
The system displays a message similar to the following: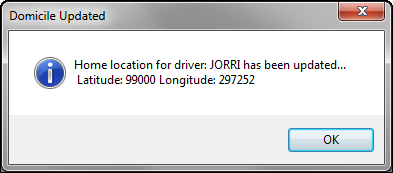
-
Click OK.
-
Click
Save.
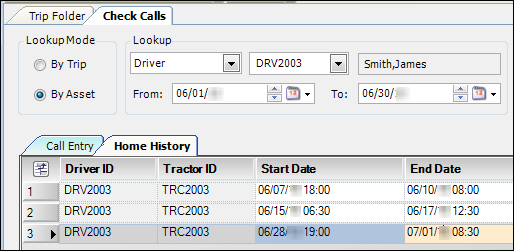
Recording and viewing a driver’s home history
You view and record a driver’s home history on the Home History tab. Each row represents a time when the driver was home.
Recording a driver’s home history
To add entries for a driver’s home history, follow these steps:
-
Go to Operations > Checkcalls.
-
In the Lookup Mode pane, select By Asset.
-
In the Lookup pane, make the following entries:
-
In the first field, select Driver.
-
In the second field, enter the driver’s ID.
-
-
Press ENTER or click
Open. -
Select the Home History tab.
-
Click image:RecordingCheckCalls/image21.pngAdd.
The system inserts a new row. -
Make entries in the following fields:
Field Definition Driver ID
Read-only field that displays the driver’s ID
Tractor ID
If you have associated a tractor with the driver in the driver’s profile, the tractor ID is displayed in this field
Start Date
Enter the date and time when the driver began his time at home.
End Date
Enter the date and time when the driver ended his time at home.
-
Click
Save.
Viewing a driver’s home history
To view a driver’s home history, follow these steps:
-
Go to Operations > Checkcalls.
-
In the Lookup Mode pane, select By Asset.
-
In the Lookup pane, make the following entries:
-
In the first field, select Driver.
-
In the second field, enter the driver’s ID.
-
In the From and To fields enter the dates for which you want to view home history.
-
-
Press ENTER or click
Open. -
Select the Home History tab to view the data.
Computing the next stop’s ETA from a driver check call
When a driver calls in his current location, the dispatcher can enter this data in the Check Calls window. The system will compute the distance and the estimated time to arrival (ETA) at the next scheduled stop.
To use this feature:
-
Go to Operations > Checkcalls. The Check Calls window displays.
-
In the Lookup pane, select the driver (or tractor).
Note: The asset must have a status of On the Road, meaning that its current trip has started.
-
With the Call Entry tab in view, click
Add.
The system displays this information:-
Current date/time in the Date field
-
Track Point in the Event field
As needed, you can modify these fields. You can also add a note in the Comments field.
-
-
Enter the driver’s location at the time of the call in the City Name field.
-
Click
Save.
The system pulls information from your mileage interface to calculate the number of minutes and miles needed to travel from the check call location to the next unactualized stop on the trip. It displays the ETA information in the In Route To pane.
Field Definition Location
Location of the next unactualized stop on the trip
ETA
Date/time scheduled for the arrival at the next unactualized stop
New ETA
Date/time calculated for the arrival at the stop based on the last check call
Miles From
Estimated distance (in miles) from the location of the last check call to the location of the next unactualized stop
Min From
Estimated travel time (in minutes) from the location of the last check call to the location of the next unactualized stop
In our example, there is a Track Point event recorded in Dayton, OH (indicated in the City Name column, on the Call Entry tab). The next unactualized stop is in Cincinnati, OH (indicated in the Location field, inside the In Route To pane). The mileage interface associated with the system has calculated a distance of 52 miles, and based on that distance, has calculated a travel time of 58 minutes.
Use the [MileageType]CheckCalls setting in your TTS50 setting to specify the mileage interface used for calculating the ETA from a check call location. The specified mileage interface must support latitude and longitude lookups.
|
Setting up custom check call events
The CheckCallEvent label allows you to define check call events that are relevant to the way your company wants to use check calls.

For example, some clients may use events such as a Reefer Temperature Check, Door Open, Door Closed, etc. You may want to log such special events as check calls, either manually or through TotalMail.
Initially, the CheckCallEvent label will be populated with all the TMWSuite event codes as maintained in System Administration. However, check call event types need not be limited to only the system’s event codes. In fact, check call events are treated as separate entities from dispatch events even though they may have the same name and meaning.
Check call events appear as options in the CheckCallEvent field of the Call Entry tab of the Check Calls window:
|