Using the Swap Driver Shifts feature
First available in TMW Operations V.2023.2
The Swap Driver Shifts feature provides the ability to swap between two or more driver’s shifts. The system automatically swaps any trips between driver’s shifts you select that are in a Planned (PLN) status.
| If an order is in another status other than PLN, it will not be swapped. The trip will remain on the original driver’s shift. |
To use the Swap Driver Shifts feature, follow these steps:
-
Go to TMW Operations > Trip Planner and select an option from the Trips, Shift and Date fields.
-
Click the Refresh button to load trips, driver shifts and shift assignments.
-
Select and right-click on any of the Driver Shift cards and select the Swap Driver menu option.
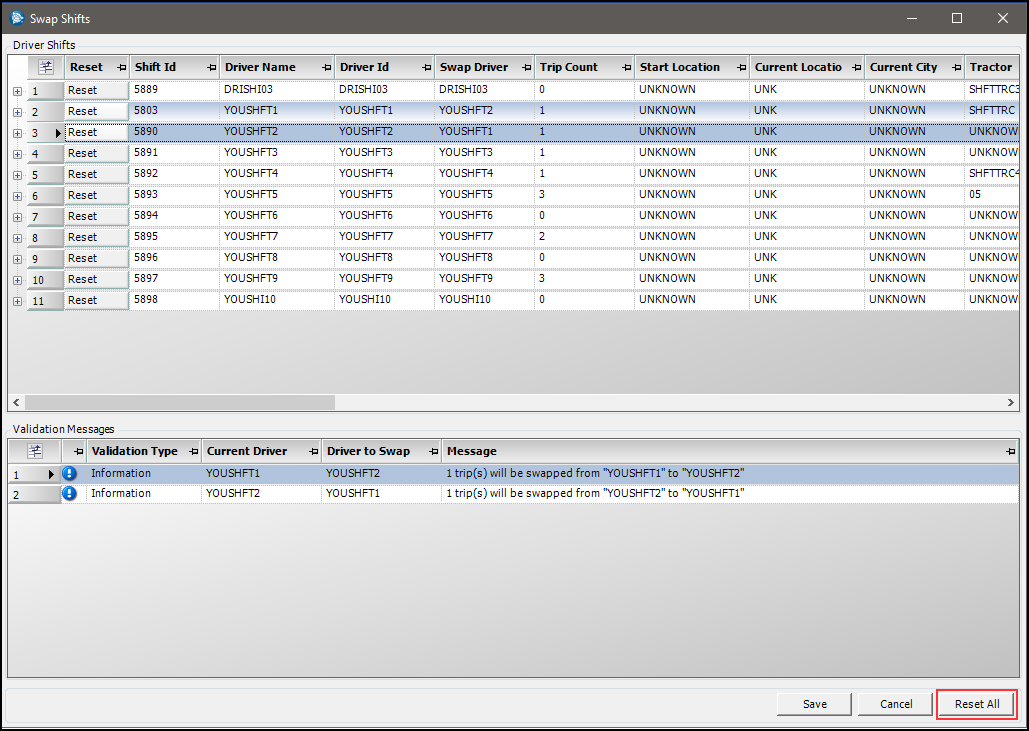
The Swap Shifts window opens. In the Driver Shifts grid displays all of the driver shifts that were currently populated in the Trip Planner.
Note: Any pending changes that were made in the Trip Planner must be saved before the Swap Shifts window can open. If there are currently no trips assigned to any of the drivers, the Swap Shifts window will display a warning message and will not open.

-
Click the plus icon next to a driver shift row to expand the grid. The legs assigned to the driver are displayed.
Note: The leg information is read only. -
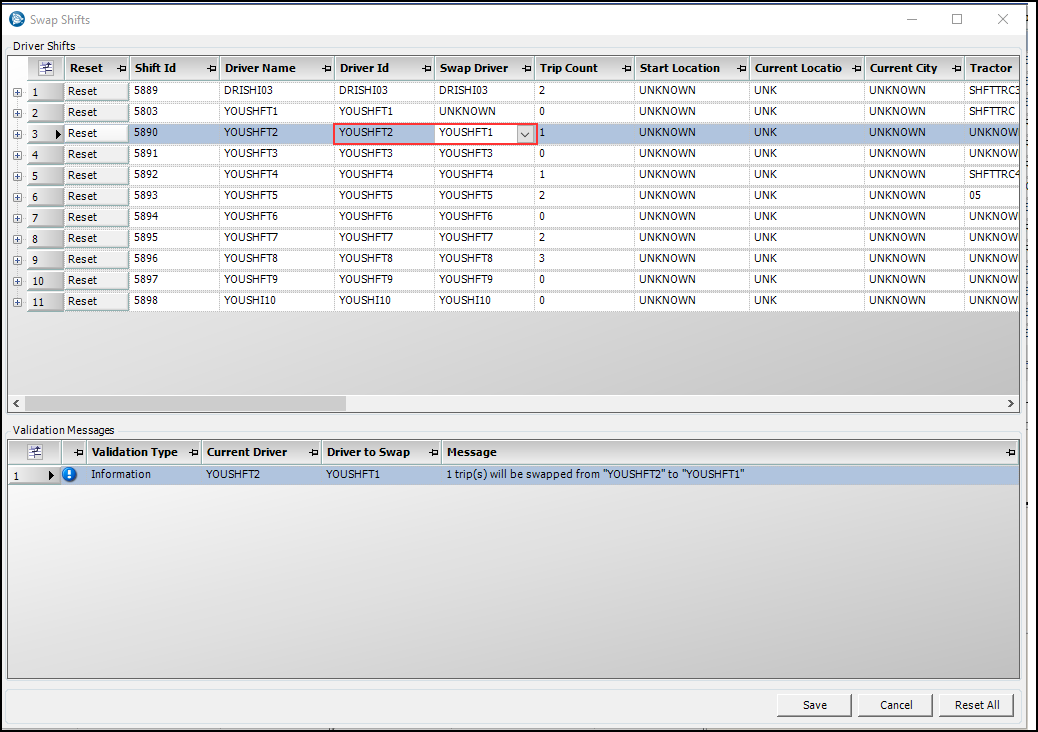
In the Swap Driver column are the drivers that are available with shifts that can be swapped.
Select a driver that is different than the currently assigned driver. This will determine the shift to be swapped to that selected driver.
-
Click on the Save button to save swapped shifts.
When you swap a driver, the Swap Driver column will update to "UNKNOWN".
Any trips assigned to that driver can be swapped to a different driver. The shift start time will be updated to the new driver’s shift start time.
If no other driver is selected to be swapped, the assigned trips will be removed from the driver and put back to an Available (AVL) status.
Once all valid driver shift swaps have been made and saved successfully, the Driver Shifts window will close and you’ll be returned to the Trip Planner. The Trip Planner will automatically refresh with the changes that were made.
Swapping Shifts Validation Messages
When you use this feature, validation messages will display in the Validation Messages section at the bottom of the Swap Shifts window. The messages could be informational, warnings or errors that pertain to the driver swaps being made. If there any save errors or warnings, the message will pop-up displaying all applicable errors and warnings. If only warnings exist you can click the OK button to acknowledge the warning(s) and continue by clicking the Save button.
|
If there are save errors that will prevent saving, the impacted swap records will need to be fixed before you can successfully save the shift swaps. |

Below are examples of some of the most common validation messages:
Information: "X number of trip(s) will be swapped from one driver to another" - When a row has had the driver swapped.

Information: "X number of trip(s) will be unassigned from a driver" - When a driver who has trips assigned has been selected for a swap and no other driver is selected to receive their trips.

Error: "Driver cannot be swapped more than once" - When the same driver is designated to be swapped on more than one row.

Error: "The driver has no assigned trips to be swapped" - When a row is swapped but the original driver has no assigned trips.

Warning: "Leg is in a planned status and cannot be swapped" - When a row is swapped but there exists legs that are not in a Planned (PLN) status (Dispatched (DSP), Started (STD), or Completed (CMP))

Resetting a Driver Shift swap
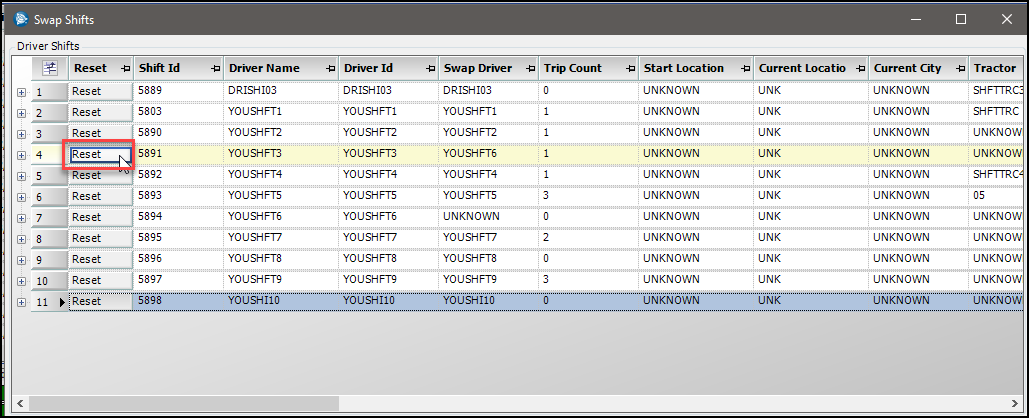
To undo a driver shift swap, a Reset button is available for each data grid row in the Driver Shifts grid.
The button is only activated when a driver swap has been assigned.
You can reset a driver swap with these options:
-
Click the Reset button.
The Swap Driver column will be set equal to the Driver Id column which will undo the driver swap. -
Click the Reset All button.
All pending swaps will be undone.
Note: The Reset All button is activated when one or more driver swaps have been assigned.